Microdermabrasion Black Skin: Top Benefits You Should Know

Key Takeaways

  • Microdermabrasion is Safe for Dark Skin: When performed correctly, microdermabrasion can be a safe and effective treatment for individuals with dark skin, offering benefits like improved texture and tone while minimizing risks of transient hyperpigmentation and addressing acne scars.
  • Consult a Professional: Always seek a qualified dermatologist or licensed aesthetician experienced with dark skin to minimize risks of permanent depigmentation, acne scars, mottled hypopigmentation, and ensure optimal results from laser treatment.
  • Pre-Treatment Preparation is Key: Follow pre-treatment guidelines such as avoiding sun exposure and certain skincare products to prepare your skin for procedures like laser irradiation, chemical peeling, and permanent depigmentation, enhancing the effectiveness of the treatment.
  • Post-Treatment Care is Crucial: Adhering to post-treatment care, including moisturizing and avoiding harsh products, helps in the healing process, prevents skin irritation, and maximizes the benefits of microdermabrasion.
  • Sun Protection is Essential: Consistently use sunscreen after treatment to protect your skin from UV damage and prevent hyperpigmentation, hypopigmentation, and acne scar.
  • Regular Treatments for Best Results: For sustained improvements and to address acne, consider scheduling regular microdermabrasion sessions for the epidermis as recommended by your skincare professional.

Understanding Microdermabrasion

What is Microdermabrasion

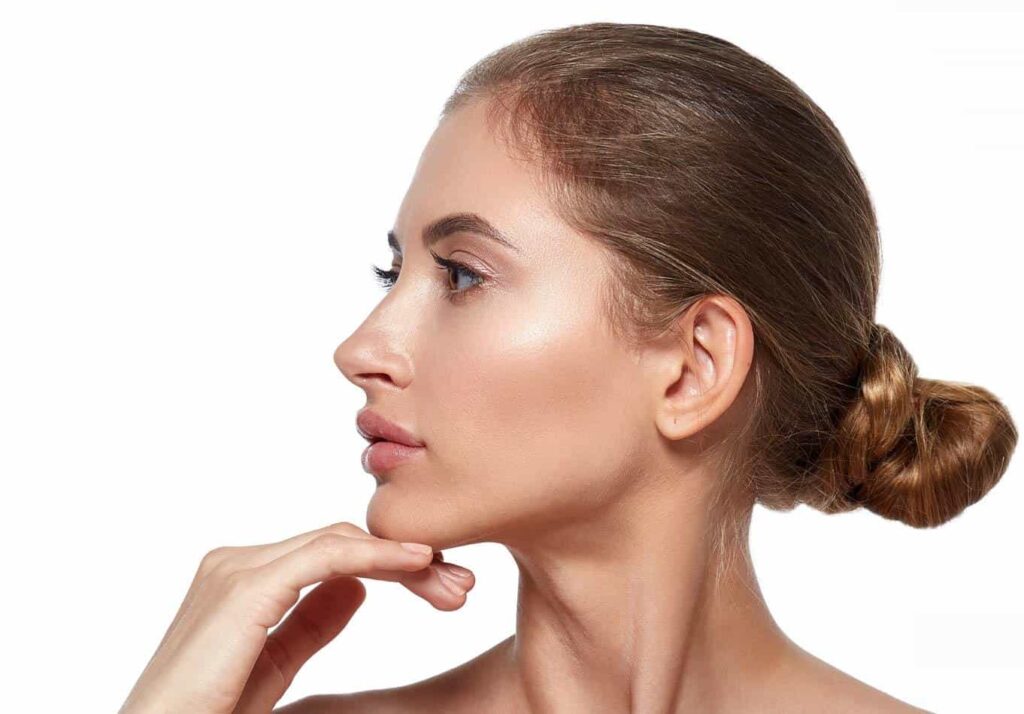
Microdermabrasion is a popular skin treatment. It rejuvenates the skin by removing dead cells. This process helps in promoting new cell growth. Microdermabrasion uses a special device to exfoliate the stratum corneum of the epidermal layer of the skin.

Safe for Dark Skin

Microdermabrasion can be safe for dark skin when done correctly, preventing hypopigmentation and protecting melanin in the dermis. It’s crucial to use the right technique and equipment. Incorrect application may cause epidermal injury or hyperpigmentation. Consulting a qualified dermatologist is essential.

Skin Structure Differences

Dark and fair-skinned individuals have different skin structures. Melanocytes, which produce melanin, are more active in darker epidermal skin, affecting pigmentary levels. This higher activity affects how treatments like microdermabrasion work. Darker skin types need careful handling to avoid complications.

Mechanical Process

The mechanical process involves using a handheld device. The device sprays tiny crystals onto the skin surface. These crystals gently abrade the stratum corneum, which is the outermost layer of dead epidermal skin cells. After abrasion, suction removes these particles along with dead cells and tissue.

Promoting New Cell Growth

By removing dead cells, microdermabrasion promotes new cell growth. This leads to smoother and brighter skin over time. The procedure also enhances blood circulation in treated areas, aiding in overall epidermal skin health and reducing erythema in skinned patients.

Benefits for Dark Skin

Reducing Hyperpigmentation

Microdermabrasion helps reduce hyperpigmentation in dark skin. It removes the outer layer of dead skin cells. This process can fade dark spots, reduce hypopigmentation, and even out the skin tone. Dark skin patients often struggle with hyperpigmentation and hypopigmentation due to higher melanin content, leading to pigmentary issues. Microdermabrasion is effective because it targets these pigmented areas.

Evening Out Skin Tone

This treatment is beneficial for evening out the skin tone in individuals with a darker complexion, addressing hypopigmentation and pigmentary issues. By removing the top layer of skin, skinned patients see new and healthier skin emerge with reduced hypopigmentation depth and improved light reflection. This results in a more uniform appearance. Ethnic skinned patients can achieve a smoother and more balanced look after several pigmentary sessions with energy.

Increasing Collagen Production

Microdermabrasion stimulates collagen production. Collagen is essential for maintaining firm and youthful-looking skin, according to the study on skinned patients. Increased collagen can improve the texture of dark-skinned patients’ skin, making it feel smoother and appear more vibrant.

Improving Skin Texture

The treatment also enhances overall skin texture. It reduces the appearance of acne scars and fine lines in fair skin patients and individuals with dark skin tone. For those with dark skin tone, improved texture means fewer visible imperfections and a more polished look for skinned patients.

Choosing a Knowledgeable Professional

Selecting an experienced professional is crucial for patients of color undergoing microdermabrasion. A skilled practitioner knows how to handle different skin types, color, and energy safely in skinned patients. They minimize risks like post-inflammatory hyperpigmentation and skin irritation, which can occur in both fair skin patients and dark skin patients if not done correctly.

Pre-Treatment Tips

Skin Assessment

A thorough skin assessment is essential. A professional can tailor the treatment to individual skin types, effects, and color. This helps in identifying any specific needs or concerns.

Different skin types react differently to microdermabrasion. Understanding these reactions can minimize risks and enhance results.

Discontinue Sensitizing Products

Stop using products that may sensitize the skin. These include retinoids, exfoliants, and certain acne treatments.

Discontinuing these products at least one week before treatment can avoid adverse reactions in fair skin patients and dark skin patients. This reduces the risk of irritation for fair skin individuals and ensures better outcomes.

Use Priming Agents

Priming agents prepare the skin for microdermabrasion. Hydroquinone or tretinoin cream are commonly recommended.

These agents help reduce hyperpigmentation risks. They also promote even healing and improve overall results.

Possible Side Effects

Microdermabrasion has possible side effects. These include redness, swelling, and minor bruising.

In rare cases, more severe reactions like skin irritation, scarring, or infection can occur depending on the skin type. Proper pre-treatment care minimizes these risks.

Types of Treatments

There are different types of microdermabrasion treatments available. Crystal microdermabrasion uses fine crystals to exfoliate the skin.

Diamond-tip microdermabrasion uses a diamond-tipped wand to remove dead skin cells in skinned patients, et al. Each type has its benefits and considerations.

Treatment Process

Cleansing

The microdermabrasion treatment begins with cleansing the skin. This step removes dirt, oil, and makeup. It prepares the skin for the procedure. A gentle cleanser is often used to avoid irritation.

Microdermabrasion Procedure

During the microdermabrasion procedure, a device sprays tiny crystals onto the skinned patients’ skin’s surface for the study of color. These crystals exfoliate dead skin cells. The device then vacuums up the crystals and dead cells, reducing skin irritation in skinned patients. This process can take 30 to 60 minutes.

Sensations Experienced

Patients might feel mild tingling during the treatment. Some describe it as a light scratching sensation. There is usually no pain involved.

Customization for Dark Skin

For black skin, customization of the treatment is crucial. The technician adjusts the settings to prevent excessive irritation or damage for fair skin patients based on their skin type study. Lower suction levels are often used to avoid causing thermal injury or hyperpigmentation in fair skin patients.

Post-Treatment Care

After microdermabrasion, soothing products are applied to the skin. These may include moisturizers and sunscreens. They help calm the skin and protect it from UV rays in patients, according to the study, regardless of color.

Post-Treatment Care

Hydration and Skincare

Hydration is crucial after microdermabrasion. Drinking plenty of water helps skin heal faster. Use gentle skincare products to avoid irritation. Opt for a mild cleanser and a fragrance-free, color moisturizer, et al skin patients study.

Skinned patients should avoid harsh chemicals. Products with hyaluronic acid can help retain moisture. This keeps the skin soft and supple.

Sun Protection

Avoid direct sun exposure after treatment. Newly sensitized skin is more prone to damage. Using a broad-spectrum sunscreen is essential. Choose one with at least SPF 30.

Apply sunscreen every two hours when outdoors. Wear protective clothing like hats and long sleeves for added protection, et al.

Follow Professional Advice

Following a professional’s specific aftercare instructions is vital. They know your skin type and its needs best. Ignoring these guidelines can lead to complications.

Professionals may advise on products to use or avoid. They might recommend patients avoiding certain activities that could irritate the skin, et al.

Managing Side Effects

e side effects like redness or swelling are normal. These usually subside within a few days. If symptoms persist, consult your dermatologist.

Avoid picking or scratching the treated area to prevent scarring, skin patients, et al. Keep the area clean to avoid infections.

Identifying Risks

Common Risks

Microdermabrasion can cause temporary redness and swelling. These effects usually last a few hours to a day in skin patients, according to the study. Some people may experience minor discomfort during the procedure. Rarely, microdermabrasion can lead to scarring.

The risk of scarring is higher if the treatment is too aggressive, study et al found in patients. This is especially true for those with sensitive skin. Always inform your dermatologist about any skin conditions beforehand.

Hyperpigmentation

Post-inflammatory hyperpigmentation (PIH) is a significant concern for patients with darker skin tones, as noted in the study by et al. PIH occurs when the skin darkens after an injury or inflammation, as noted in the study by et al involving patients. Microdermabrasion can sometimes trigger this condition.

To mitigate PIH, follow these steps:

  1. Use sunscreen daily.
  2. Apply topical treatments recommended by your dermatologist.
  3. Avoid sun exposure as much as possible.
  4. Follow post-treatment care instructions closely.

These steps help patients reduce the risk of developing hyperpigmentation after microdermabrasion, according to the study by et al.

Signs of Improper Treatment

Improper treatment can cause excessive skin irritation or burns. Watch for signs like severe redness, blistering, or intense pain during or after the procedure, et al., in patients.

If you notice these symptoms, take immediate action:

  • Stop using any harsh skincare products.
  • Apply a cool compress to soothe the area.
  • Contact your dermatologist immediately for advice.

Early intervention can prevent further complications and promote faster healing in patients.

Energy Levels Used

The energy levels used in microdermabrasion vary depending on patients’ skin type and condition, et al. For darker skin tones, lower energy levels are often safer for patients, et al. High energy levels increase the risk of adverse events such as burns or excessive irritation in patients, et al.

Always ensure that your practitioner uses appropriate settings tailored to your skin type and patients. This minimizes risks and ensures a more comfortable experience.

Sun Protection Importance

Hyperpigmentation Risk

Sun protection is crucial after microdermabrasion. Black skin individuals are more prone to hyperpigmentation. Exposure to UV rays can worsen this condition. The epidermis, the outermost layer of skin, contains melanin. Melanin protects patients against sun damage but can also lead to dark spots.

Sunscreen Use

High SPF sunscreen is essential. A broad-spectrum sunscreen with at least SPF 30 should be applied daily by patients, et al. Reapply every two hours when outdoors. This prevents harmful UV rays from penetrating the epidermis and causing damage to patients.

Additional Measures

Other sun protection measures are also important:

  • Wear wide-brimmed hats.
  • Seek shade during peak UV radiation hours (10 AM to 4 PM), et al.
  • Use sunglasses that block UV rays.

These steps help protect the stratum corneum, the top layer of the epidermis, from damage in patients et al.

Tanning Dangers

Tanning should be avoided after microdermabrasion. It increases the risk of skin damage and hyperpigmentation. Tanning beds are particularly harmful as they emit concentrated UV radiation, et al, affecting patients.

Results and Frequency

Gradual Improvement

Results from microdermabrasion on black skin usually appear gradually. Expect patients to see a smoother texture and more even tone over several sessions. Each session removes a layer of dead skin cells from patients, revealing fresher skin underneath. This process can help patients reduce hyperpigmentation and improve overall complexion.

Studies show that multiple treatments yield the best results. For instance, a study found that patients saw noticeable improvements after 4-6 sessions, et al. Patience and consistency are key for achieving satisfactory results.

Treatment Frequency

Treatments should be spaced out to allow patients’ skin to recover fully. Experts recommend scheduling sessions every 2-4 weeks. This interval minimizes the risk of side effects like irritation or redness in patients.

Frequent treatments might lead to complications, especially for patients with darker skin tones. Allowing patients time between sessions ensures the skin heals properly and reduces any adverse effects.

Long-Term Effects

Long-term benefits for patients include reduced appearance of scars, fine lines, and improved overall skin health. Consistent treatment is essential for maintaining these results over time for patients.

A study by patients et al showed that long-term improvement in skin texture and tone requires at least six months of regular treatments. The rate of improvement may vary depending on individual skin conditions and adherence to aftercare routines for patients.

Managing Side Effects

Side effects are generally minimal but can occur. Redness, slight swelling, or sensitivity are common for patients immediately after treatment but typically subside within a few days.

To minimize risks:

  • Follow post-treatment care instructions
  • Avoid sun exposure
  • Use gentle skincare products

Choosing the Right Professional

Licensed Dermatologist

Selecting a licensed dermatologist is crucial. They should have experience treating dark skin tones. This ensures safety and effectiveness during the microdermabrasion process. Dark skin can react differently compared to fair skin. Incorrect procedures may cause hyperpigmentation or scarring.

Reviews and Photos

Consulting reviews is important. Look for feedback from people with similar skin types. Before-and-after photos can show the results on black skin patients, et al. These visual examples help gauge the professional’s expertise.

Consultation Session

Schedule a consultation before committing. Discuss your goals and potential risks with the professional. Ask patients about their knowledge of pre and post-treatment care for dark skin et al. This session helps assess if they are an appropriate selection for patients et al.

Knowledge of Agents

Ensure the professional knows suitable agents for dark skin. Certain treatments may not be ideal for darker tones. For example, IPL (Intense Pulsed Light) might not be recommended for patients due to higher melanin levels in black skin, et al.

Equipment Familiarity

Ask if they use equipment suited for dark skin, like switch neodymium lasers, et al., for patients. These devices are safer and more effective for patients with higher melanin levels, et al.

Post-Treatment Care

Discuss post-treatment care specific to black skin. Proper care minimizes side effects like hyperpigmentation or irritation. The right advice can enhance results and maintain healthy skin for patients.

Final Remarks

Microdermabrasion can be a game-changer for patients with dark skin, et al. It’s crucial for patients to follow pre and post-treatment care tips to maximize benefits and minimize risks. Always prioritize sun protection to maintain your patients’ skin’s health and glow.

Ready for smoother, brighter skin? Choose a qualified professional to guide patients through the process. Your skin deserves the best care. Don’t wait—take the first step towards radiant skin today!

Frequently Asked Questions

Can microdermabrasion be safely performed on black skin?

Yes, microdermabrasion can be safely performed on black skin. When done by a skilled professional, it minimizes risks for patients and enhances skin appearance.

What are the benefits of microdermabrasion for dark skin?

Microdermabrasion helps even out skin tone, reduces hyperpigmentation, and smooths texture for patients, et al. It also boosts collagen production for healthier-looking skin.

How should I prepare my skin before a microdermabrasion treatment?

Avoid sun exposure and discontinue any exfoliating products a week before treatment, patients et al. Cleanse your face thoroughly on the day of the procedure, patients et al.

What does the microdermabrasion treatment process involve?

A professional uses a handheld device to exfoliate the outer layer of patients’ skin. The process is quick, typically lasting 30-60 minutes.

What post-treatment care is required after microdermabrasion?

Keep your skin moisturized and avoid direct sun exposure. Use a gentle cleanser and apply sunscreen daily to protect your skin, patients et al.

Are there any risks associated with microdermabrasion for black skin?

Risks include temporary redness, minor swelling, and slight irritation. Choosing an experienced professional minimizes these risks.

How often should I get microdermabrasion treatments for optimal results?

For best results, schedule treatments every 4-6 weeks. Consult with your skincare professional to determine the ideal frequency based on your skin type.

Facial Sculpting Cost: Non-Surgical Jawline Breakdown

Key Takeaways

  • Understanding Facial Sculpting: Facial sculpting uses non-surgical methods, including jawline injections, to enhance facial features, offering a quicker and less invasive alternative to surgery by plastic surgeons.
  • Types of Injectables: Common injectables, often administered by plastic surgeons, include Botox, dermal fillers, Kybella, and jawline injections, each serving different purposes such as reducing wrinkles, enhancing faces, or dissolving fat in muscles.
  • Average Costs Explained: The cost of facial sculpting varies widely depending on the type of injectable used, with plastic surgeons offering jawline injections for jowls, and prices typically ranging from $500 to $2,000 per session.
  • Benefits Over Surgery: Non-surgical facial sculpting, including jawline injections and injectable treatments for jowls and excess neck fat, offers benefits like minimal downtime, fewer risks, and reversible results compared to traditional surgery.
  • Choosing the Right Injectable: Consult with a certified professional to determine the best injectable for your specific needs and desired outcomes, whether it’s jawline injections, treating jowls, or reducing excess neck fat.
  • Jawline Sculpting Success Stories: Real-life success stories highlight the transformative effects of jawline sculpting, showcasing significant improvements in facial symmetry and contour, addressing jowls through injectable treatments.

Understanding Facial Sculpting

Definition and Purpose

Facial sculpting is a cosmetic procedure. It enhances facial features by reshaping or contouring the face, including jowls, through injectable treatments. The goal is to achieve a more balanced and youthful appearance through injectable treatments and addressing jowls. People seek facial sculpting, including injectable treatments, to address issues like sagging skin, wrinkles, or uneven facial structures.

Custom Designs by Dr. Rob Berberian

Dr. Rob Berberian specializes in facial sculpting. He custom designs each Celebrity Facial Sculpting Package. These packages are tailored to meet individual goals. Dr. Berberian considers the unique features of each patient’s face.

He uses advanced techniques to plan the procedures. This personalized approach ensures better results for each person.

Latest Cosmetic Techniques

The latest cosmetic techniques play a crucial role in facial sculpting. They help achieve desired outcomes with minimal downtime. Techniques include:

  • Dermal fillers: These add volume to areas like cheeks and lips.
  • Botox: This reduces wrinkles and fine lines.
  • Laser treatments: These improve skin texture and tone.

These methods are less invasive than traditional surgeries. Patients often prefer them due to quicker recovery times.

Achieving Long-lasting Results

Facial sculpting offers long-lasting results when done correctly. The effects can last several years with proper care. Regular maintenance sessions may be needed to sustain the results.

Types of Injectables

Botox

Botox is a popular injectable treatment. It relaxes muscles to reduce wrinkles. Common areas include the forehead and around the eyes. The effects last about three to six months.

Dermal Fillers

Dermal fillers add volume to the face. They use substances like hyaluronic acid. Fillers can plump lips, cheeks, and other areas. Results can last from six months to two years.

Juvederm

Juvederm is a type of dermal filler. It targets deep lines and folds. Juvederm also enhances lips and cheeks. The results are immediate and last up to one year.

Restylane

Restylane is another dermal filler option. It’s used for lip enhancement and smoothing wrinkles. Restylane’s effects usually last six to nine months.

Radiesse

Radiesse adds volume and stimulates collagen production. It’s made of calcium hydroxylapatite microspheres. Radiesse treats deeper facial lines and lasts over a year.

Sculptra

Sculptra focuses on collagen production over time. It uses poly-L-lactic acid to restore facial volume gradually. Multiple sessions are needed for optimal results, which last up to two years.

Kybella

Kybella targets fat under the chin, known as submental fullness. It uses deoxycholic acid to break down fat cells permanently. Results are visible after two to four treatments.

Average Costs Explained

Treatment Packages

The cost of facial sculpting varies. Different treatments are included in the packages. Some packages might include Botox, fillers, or fat grafting. Each treatment affects the overall price.

A basic package might only include Botox injections. This is less expensive compared to a package with multiple treatments. Packages with more treatments will cost more.

General Cost Range

Facial sculpting costs can range widely. A single Botox session can cost between $300 and $600. Fillers like Juvederm or Restylane may range from $500 to $1,000 per syringe.

More extensive procedures like fat grafting can cost between $2,000 and $5,000. These prices vary by location and provider.

Consultation Importance

Exact pricing details come after a consultation. During this meeting, goals and needs are discussed. The doctor will then provide a detailed quote.

Each patient’s needs are unique. Goals and desired outcomes affect the final price.

Benefits Over Surgery

Non-Invasive Nature

Facial sculpting is non-invasive. This means no cuts or stitches are needed. Plastic surgeons often use methods like laser treatments or massage. These techniques reshape the face without surgery.

Surgical procedures, on the other hand, involve incisions. They require anesthesia and can leave scars. Recovery from surgery can take weeks or even months.

Shorter Recovery Times

Recovery time for facial sculpting is shorter. Most people return to normal activities within a few days. There is minimal swelling and bruising.

In contrast, surgical procedures have longer recovery periods. Patients may need to take time off work. They also face risks like infection and complications from anesthesia.

Lower Risk Profiles

Facial sculpting has a lower risk profile compared to surgery. Non-invasive methods avoid major risks associated with surgery.

Surgeries have higher risks of complications like infection and scarring. Anesthesia itself poses risks, especially for older adults or those with health issues.

Cost-Effectiveness

Facial sculpting is more cost-effective than surgery. The average cost of non-invasive treatments is lower.

Surgical procedures are expensive due to hospital fees and anesthesia costs. Post-surgery care adds to the expenses as well.

Choosing the Right Injectable

Consulting Professionals

Consulting a professional is crucial. Experts like Dr. Rob Berberian can guide you. They assess your facial structure and goals.

Dr. Berberian examines your skin type. He considers your medical history. This helps in selecting the right injectable.

Understanding Longevity

Different injectables last for varying times. Botox typically lasts three to six months. Dermal fillers can last from six months to two years.

Knowing this helps in planning future treatments. It also affects the overall cost.

Desired Outcomes

Consider what you want to achieve. Some injectables add volume, while others smooth wrinkles.

For example:

  • Botox: Reduces fine lines and wrinkles.
  • Hyaluronic Acid Fillers: Add volume and contour.
  • Calcium Hydroxylapatite: Smooths deeper wrinkles.

Choose based on your specific needs.

Budget Considerations

Injectables vary in cost. Botox might be cheaper initially but requires more frequent sessions. Fillers may cost more upfront but last longer.

Budget for maintenance treatments too. This ensures consistent results over time.

Potential Side Effects

All treatments have side effects. Common ones include redness, swelling, and bruising at the injection site.

e people might experience allergic reactions or infections. Discuss these risks with your doctor before proceeding.

Weighing Options

Compare different injectables carefully:

  • Botox: Short-term, less expensive.
  • Fillers: Longer-lasting, higher initial cost.

Evaluate how each option fits into your lifestyle and budget.

Jawline Sculpting Success Stories

Jawline Injections

Many people have found success with jawline injections. John, a 45-year-old man, shared his story. He felt self-conscious about his jowls and excess neck fat. After consulting with a specialist, he decided to try jawline injections.

John noticed immediate results. His jawline appeared more defined. Friends and family commented on his youthful look. This boosted John’s confidence significantly.

Another example is Maria, a 30-year-old woman. She wanted a sharper jawline for her wedding photos. Maria opted for jawline injections six months before her big day. Her photos turned out stunning. She felt beautiful and confident on her special day.

Jowls Reduction

Reducing jowls can greatly improve one’s appearance. Sarah, aged 50, struggled with sagging skin around her jawline. She tried various creams and treatments but saw no improvement.

Sarah then chose to undergo a sculpting procedure targeting her jowls. The results were remarkable. Her face looked firmer and more youthful. Sarah reported feeling happier and more satisfied with her appearance.

Mark, another client, had similar issues with jowls. At 55, he felt his sagging skin made him look older than he was. After the procedure, Mark’s face looked rejuvenated. He received many compliments from colleagues and friends.

Excess Neck Fat Removal

Excess neck fat can be bothersome for many people. Lisa, 38 years old, always wore scarves to hide her neck fat. She decided enough was enough and opted for a sculpting procedure.

The transformation was amazing. Lisa no longer felt the need to cover up her neck area. She wore low-cut tops confidently after the treatment.

David also dealt with excess neck fat in his late 40s. He felt it impacted his professional image negatively. Post-procedure, David’s neck looked slimmer and more defined. He reported feeling more assertive during business meetings.

Confidence Boost

Most clients report a significant confidence boost post-procedure. Emma shared how jawline sculpting changed her life at age 29. She had always been insecure about her rounded face shape.

After the treatment, Emma felt more attractive and self-assured in social settings.

Tom experienced something similar at age 40 when he underwent jawline injections to combat aging signs around his face and neck area.

Before and After Results

Visual Evidence

Many clients see significant changes after facial sculpting. Photos of before and after results show the impact on their overall appearance. For example, a client may have fuller cheeks and a more defined jawline after treatment.

Personalized Approach

Each client’s face is unique. Professionals tailor treatments to achieve natural-looking results. They consider the person’s facial structure and goals. This personalized approach ensures that each client gets the best possible outcome.

Variability in Results

Results can vary based on individual treatment plans. The types of injectables used also play a role. Some clients may need more appointments to achieve their desired look.

Treatment Areas

Facial sculpting can target different areas such as the cheeks, jawline, and forehead. Each area requires specific techniques for optimal results. For instance, enhancing the cheeks can give a youthful appearance.

Downtime and Recovery

Downtime after facial sculpting is generally minimal. Most clients return to their normal activities quickly. However, some swelling or redness might occur in the treated area.

FAQs on Jawline Sculpting

Safety Concerns

Jawline sculpting is generally safe. Certified professionals use FDA-approved fillers. Complications are rare but can include swelling or bruising. Always choose a licensed practitioner to minimize risks.

Longevity of Results

Results from jawline sculpting can last between 12 to 18 months. This depends on the type of filler used and individual metabolism. Regular touch-ups help maintain the desired appearance.

Maintenance Tips

Maintain results by following post-procedure care instructions. Avoid strenuous activities for 24 hours. Stay hydrated and follow a healthy skincare routine.

Pain Level

Many worry about pain during jawline sculpting. Most procedures involve minimal discomfort. Practitioners often use numbing creams to reduce pain.

Downtime Expectations

Downtime is usually short. Most people resume normal activities within a day or two. Mild swelling or redness may occur but typically subsides quickly.

Preparing for Consultation

Prepare for your consultation by researching providers in advance. Make a list of questions and concerns about the procedure.

Key Questions to Ask

Ask about the practitioner’s experience with jawline sculpting. Inquire about potential side effects and recovery time. Discuss your goals to ensure clear communication of desired outcomes.

Summary

Facial sculpting offers a non-surgical way to enhance your appearance. By understanding the types of injectables and their costs, you can make an informed decision. The benefits over surgery are clear, with less downtime and more natural results.

Ready to transform your look? Consult with a qualified professional to explore your options. Your dream jawline is just an appointment away. Don’t wait—take the first step towards a more confident you today!

Frequently Asked Questions

What is facial sculpting?

Facial sculpting involves non-surgical procedures to enhance and define facial features. It uses injectables like Botox and fillers.

How much does jawline sculpting cost?

Jawline sculpting typically costs between $500 to $2,000 per session. Prices vary based on the provider and location.

Are the results of facial sculpting permanent?

No, results are temporary. They usually last between 6 months to 2 years, depending on the type of injectable used.

Is facial sculpting safe?

Yes, when performed by a certified professional. Always choose an experienced provider to minimize risks.

How long does a facial sculpting procedure take?

Most procedures take about 30 minutes to an hour. It’s quick with minimal downtime.

What are the benefits of facial sculpting over surgery?

Facial sculpting is less invasive, has shorter recovery times, and offers natural-looking results without the need for anesthesia.

Can I return to work after a facial sculpting session?

Yes, most people can return to work immediately. There might be minor swelling or redness that subsides quickly.

Hair Transplantation Women: FUE & MDEE Procedures Explained

Key Takeaways

  • Understand the Root Cause: Knowing the underlying reasons for hair loss in women, such as androgenetic alopecia, androgenic alopecia, traction alopecia, and thinning areas, is crucial for choosing the right treatment. Consult a specialist to identify whether it’s genetic, hormonal, due to external factors, androgenetic alopecia, androgenic alopecia, female pattern hair loss, or hair loss patterns.
  • Choose the Right Method: Research and discuss with your doctor the most suitable hair transplant methods like FUE or strip procedure, considering your specific hair type and loss pattern.
  • Prepare Adequately: Follow all pre-transplant guidelines provided by your healthcare provider, including those for thinning hair and the use of minoxidil, to ensure the best possible outcome. This includes dietary changes, medication adjustments, and lifestyle modifications.
  • Budget Wisely: Hair transplant costs can vary widely. Plan your budget carefully, considering not just the hair transplant procedure but also aftercare and potential follow-up treatments.
  • Commit to Aftercare: Proper aftercare is essential for successful recovery and optimal results after a hair transplant for men on the head. Follow all post-transplant instructions, including medication, hygiene practices, and activity restrictions, head men.
  • Think Long-Term: Maintain a long-term care routine to support the health of your transplanted hair. Regular check-ups, a balanced diet, and proper hair care practices will help sustain your results.

Understanding Hair Loss in Women

Psychological Impact

Female hair loss can deeply affect self-esteem. Many women feel less confident with thinning hair. They may avoid social events or wear hats to hide their condition before considering a hair transplant. This can lead to feelings of isolation and sadness.

A study showed that hair thinning impacts mental health. Women reported feeling unattractive and embarrassed. Emotional support from friends and family is crucial.

Hormonal Fluctuations

Hormonal changes play a big role in female pattern hair loss. Pregnancy, menopause, and other life stages cause hormone levels to shift. These fluctuations can trigger hair thinning.

During pregnancy, hormones increase hair growth. After childbirth, many women experience shedding. Menopause also causes hormonal changes that lead to thinning areas on the scalp, sometimes addressed by hair transplant.

Early Detection Signs

Early detection is key in managing female hair loss. Look for signs like a widening part or increased shedding, which may indicate the need for a hair transplant. These are early indicators of androgenetic alopecia.

Many women notice more hairs on their pillow or brush. If you see these signs, consult a doctor quickly. Early treatment can help maintain healthy hair and prevent further loss.

Types of Female Hair Loss

Different patterns of hair loss affect women differently:

  • Androgenic alopecia: Thinning starts at the crown.
  • Traction alopecia: Caused by tight hairstyles.
  • Diffuse thinning: Evenly spread across the scalp.

Understanding the type helps in choosing the right treatment.

Treatment Options

Several treatments exist for female hair loss:

  1. Minoxidil: A topical solution promoting hair regrowth.
  2. Hormone therapy: Balances hormone levels.
  3. Platelet-rich plasma (PRP): Uses your blood to stimulate growth, often in hair transplant procedures.
  4. Hair transplantation: Moving healthy follicles to thin areas.

Consult a dermatologist to find the best hair transplant option for you.

Recommended Hair Transplant Methods

FUE Technique

FUE stands for Follicular Unit Extraction. It is a popular method for hair transplantation. In this hair transplant technique, individual follicular units are extracted from the donor area. These follicular units are then transplanted to the thinning or balding areas.

FUE is suitable for women with localized hair loss. It works well if the donor hair density is high. The procedure involves minimal scarring and faster recovery time. Women who prefer shorter hairstyles may benefit more from FUE due to less visible scars.

MDEE Technique

MDEE stands for Modified Direct Extraction and Implantation. This hair transplant method involves extracting groups of follicles rather than individual ones. The extracted follicles are then implanted directly into the recipient area during the hair transplant.

MDEE is beneficial for women with diffuse thinning across the scalp and may complement a hair transplant. It allows for a larger number of hairs to be transplanted in one session. This method can provide more coverage and density in cases of widespread hair loss.

Personalized Consultation

Choosing between FUE and MDEE depends on individual needs. A personalized consultation with a specialist is crucial. The doctor will assess your hair loss pattern and donor hair availability.

A tailored approach ensures better results. Factors like hair type, scalp condition, and overall health play a role in determining the best method.

Misconceptions About Effectiveness

There are common misconceptions about hair transplants in women versus men. Some believe that transplants are less effective in women. This is not true.

Both men and women can achieve successful outcomes with proper hair transplant techniques. The key lies in selecting the right method based on individual conditions, such as hair transplant.

Exploring FUE and MDEE Techniques

FUE Process

FUE stands for Follicular Unit Extraction. This technique involves removing individual hair follicles from the donor area. The surgeon uses a micro-punch tool to extract these follicles for a hair transplant. The hair transplant procedure is minimally invasive, which means there are fewer scars and a quicker recovery time.

However, the donor area must be shaved. This allows the surgeon to see and access the hair follicles more easily. The extracted follicles are then implanted into the thinning or balding areas of the scalp during the hair transplant. Each follicle is placed one by one during the hair transplant, ensuring a natural look.

MDEE Procedure

MDEE stands for Mega Dense Hair Transplantation with Extensive Extraction. This technique allows for transplanting a large number of grafts in one session. Unlike FUE, MDEE hair transplant does not require shaving the donor area.

Instead, hair is carefully trimmed to match the length of surrounding hair. This makes it less noticeable that a hair transplant procedure was done. MDEE can move thousands of grafts in a single session, making it ideal for extensive hair loss.

Candidate Criteria

Not everyone is suitable for both techniques. Certain criteria make someone a good candidate for each hair transplant method.

For FUE:

  • Small to moderate hair loss
  • Willingness to shave the donor area
  • Good overall health

For MDEE:

  • Extensive hair loss needing many grafts
  • Preference for no shaving
  • Healthy scalp condition

Pre-Transplant Considerations

Medical Evaluation

A thorough medical evaluation is crucial before a hair transplant. Doctors need to identify the underlying causes of hair loss. Hormonal imbalances, nutritional deficiencies, and stress are common factors. Blood tests can help detect these issues. Addressing the root cause ensures better results post-transplant.

Realistic Expectations

It’s important to have realistic expectations about the outcomes of hair transplantation. Women should understand that hair transplant results vary from person to person. Hair density might not be as thick as natural hair. Setting achievable goals helps in avoiding disappointment later.

Skilled Surgeon

Selecting a skilled surgeon is vital for successful hair transplantation in women. Not all surgeons specialize in female transplants. Look for someone with experience in this field. Check their credentials and past patient reviews. A good surgeon will discuss potential outcomes and risks of a hair transplant openly.

Donor Site

The donor site plays a key role in hair transplantation success. The back of the scalp is usually the best donor area because it has dense hair growth. Surgeons carefully extract follicles from this site during a hair transplant to ensure minimal scarring and optimal results.

Good Candidates

Not everyone is a good candidate for hair transplantation. Women with diffuse thinning may not benefit as much from a hair transplant as those with localized bald spots. A consultation with a specialist can determine if you’re a suitable candidate.

Hair Transplant Costs

FUE Costs

Follicular Unit Extraction (FUE) is a popular hair transplant method. The cost ranges from $4,000 to $15,000. Prices vary due to several factors:

  • Clinic location: Urban areas tend to have higher costs.
  • Surgeon experience: Skilled surgeons charge more.
  • Number of grafts needed: More grafts increase the price.

MDEE Costs

Multi-Unit Grafting (MDEE) is another method. The cost ranges from $3,500 to $10,000. Factors affecting the price include:

  • Procedure complexity: More complex cases cost more.
  • Technology used: Advanced tools add to the expense.
  • Clinic reputation: Renowned clinics often charge higher fees.

Financing Options

Hair transplants can be expensive. Many clinics offer financing plans. These plans help spread out payments over time. Some common options are:

  1. Monthly installment plans
  2. Medical credit cards
  3. Personal loans

Each option has different terms and interest rates.

Insurance Considerations

Insurance usually does not cover hair transplants. They are considered cosmetic procedures. However, some exceptions exist:

  • Procedures for medical conditions like burns or trauma might be covered.
  • Always check with your insurance provider for specifics.

Value Over Cost

Choosing a clinic based solely on cost is risky. Quality and experience matter more than price alone. Low-cost clinics may cut corners, leading to poor results.

Aftercare and Recovery

Post-Op Care

Patients must follow specific instructions after a hair transplant. The clinic usually provides these guidelines. Medication is often prescribed to prevent infection and reduce swelling. Patients should take these as directed.

Activity restrictions are crucial. Avoid strenuous activities for at least two weeks. This helps protect the recipient area from damage.

Managing Side Effects

Common side effects include swelling, itching, and redness. These usually occur in the recipient area and donor area. Swelling can last for a few days post-surgery. Using cold compresses can help reduce it.

Itching is another common issue. Patients should avoid scratching to prevent infection. Topical ointments may be recommended by the clinic to relieve itching.

Timeline for Recovery

The recovery process varies among patients but follows a general timeline:

  1. First Week: Most swelling and redness subside.
  2. Two Weeks: Scabs in the recipient area begin to fall off.
  3. One Month: Hair shedding from transplanted follicles occurs; this is normal.
  4. Three Months: New hair starts to grow.
  5. Six Months: Noticeable growth in transplanted areas.
  6. One Year: Full results are visible.

Visible Growth Expectations

Visible growth takes time and patience. Initial shedding happens within the first month post-surgery, which can be alarming but is part of the process.

By three months, new hair begins to grow in the recipient area. Significant changes become noticeable around six months, with full results appearing by one year.

Stress Management

Stress can impact recovery negatively. Patients should find ways to manage stress effectively during this period.

Techniques like meditation or light exercise (after initial recovery) may help reduce stress levels.

Follow-Up Consultations

Follow-up consultations are essential for monitoring progress and addressing concerns. Clinics usually schedule these at regular intervals post-surgery.

Patients should attend all scheduled appointments to ensure optimal recovery and growth outcomes.

Long-Term Care and Results

Maintaining Health

Taking care of transplanted hair is vital. Use gentle shampoos and conditioners. Avoid products with harsh chemicals. Regularly massage your scalp to improve blood flow. This helps in maintaining healthy hair growth.

Consider using hair masks and serums. These can provide extra nourishment. Consult doctors for recommended treatments and products.

Longevity of Results

Hair transplant results are usually long-lasting. However, several factors can affect this outcome over time. Genetics play a significant role. If the underlying cause of hair loss is still active, it might impact the transplant.

Lifestyle choices also matter. A balanced diet rich in vitamins supports hair health. Stress management is crucial too, as stress can lead to hair problems.

Follow-Up Appointments

Regular follow-up appointments are essential. They help monitor the success of the transplant. Doctors can adjust your care plan based on these visits.

Ziering Medical suggests scheduling check-ups every six months initially. Later, annual visits might suffice. These appointments ensure any potential issues are addressed promptly.

Addressing Side Effects

e side effects may occur post-transplantation. These include swelling or itching at the transplant site. Over-the-counter medications usually manage these symptoms effectively.

In rare cases, more serious side effects might appear. Always report any unusual changes to your doctor immediately for proper guidance.

Success Rates

The success rate of hair transplants in women varies but is generally high when performed by experienced professionals like those at Ziering Medical. Factors such as the amount of donor hair and overall health influence success.

Doctors will assess individual conditions before proceeding to maximize positive outcomes.

Starting Your Hair Transplant Journey

Finding Clinics

Begin by researching clinics and surgeons who specialize in female hair transplants. Use online reviews and testimonials to find reputable options. Look for clinics with certified surgeons and positive patient feedback. Check if they offer different procedures such as the strip procedure or follicular unit extraction (FUE).

Initial Consultation

Prepare a list of questions before your consultation. Ask about the surgeon’s experience with female patients. Inquire about the types of procedures available, like using minoxidil or other treatments to promote new hair growth. Understand the risks and benefits of each option.

Discussing Concerns

Bring up any concerns you have during the consultation. Discuss potential side effects, recovery times, and long-term care plans for your scalp. Ensure that you feel comfortable with the answers provided by the medical team.

Support System

Having a support system is crucial throughout your hair transplant journey. Family and friends can provide emotional support and practical help post-surgery. They can assist with daily tasks while you recover.

Post-Surgery Care

After surgery, follow all post-op instructions given by your surgeon. This may include keeping your head elevated, avoiding strenuous activities, and taking prescribed medications. Proper care ensures better healing and results.

Monitoring Progress

Regular check-ups are essential to monitor progress after the transplant. Your surgeon will assess how well your new hair is growing and make any necessary adjustments to your treatment plan.

Final Remarks

You’ve taken a big step by exploring hair transplantation options for women. Understanding the process, costs, and care tips sets you on the right path. Hair transplants can be life-changing, boosting your confidence and self-esteem.

Ready to start your hair transplant journey? Consult with a specialist to find the best method for you. Don’t wait—take control of your hair health today!

Frequently Asked Questions

What causes hair loss in women?

Hormonal changes, genetics, and medical conditions are common causes. Stress and poor diet can also contribute.

Which hair transplant methods are recommended for women?

Follicular Unit Extraction (FUE) and Micrograft Direct Hair Implantation (MDEE) are highly recommended.

How do FUE and MDEE techniques differ?

FUE involves extracting individual follicles, while MDEE uses micrografts for a more natural look.

What should I consider before getting a hair transplant?

Consult with a specialist, review your medical history, and understand the procedure’s risks and benefits.

How much does a hair transplant cost?

Costs vary widely but typically range from $4,000 to $15,000 depending on the method and clinic.

What is the recovery process like after a hair transplant?

Expect mild swelling and discomfort. Most return to normal activities within a week. Follow aftercare instructions carefully.

How long will it take to see results from a hair transplant?

Visible results usually appear within 6 to 12 months as the transplanted hair grows naturally.

How to Choose a Plastic Surgeon: Find the Best for Your Procedure

Key Takeaways

  • Check Board Certification: Ensure your plastic surgeon is board-certified to guarantee they meet professional standards, have the necessary training, and achieve quality outcomes.
  • Experience Matters: Confirm the surgeon has extensive experience with the specific procedure you want, as choosing doctors with this increases the likelihood of quality outcomes and a successful choice.
  • Aesthetic Compatibility: Review before-and-after photos to research if the plastic surgeon’s aesthetic sense aligns with your desired results and provides a clear picture of quality outcomes.
  • Build Rapport: Choose a plastic surgeon you feel comfortable with, who is on the GMC specialty register, communicates clearly, and understands your aesthetic goals, answering all your questions.
  • Facility Standards: Verify that the operating facility is accredited and upholds high safety standards for plastic surgeon candidates to register.
  • Customer Service Quality: Pay attention to the responsiveness and professionalism of the staff, as this reflects the overall care you will receive from plastic surgeon candidates.

Verify Board Certification

Board Certified

Check if the surgeon is board certified. Specifically, look for certification by the American Board of Cosmetic Surgery (ABCS) for a plastic surgeon. This ensures they have met high standards in cosmetic surgery as a plastic surgeon. The ABCS focuses on training and expertise in this plastic field.

Significance of Certification

Board certification is important. It shows the surgeon has undergone rigorous training. They also pass comprehensive exams. These steps ensure they are qualified to perform plastic cosmetic procedures safely and effectively.

Educational Background

Investigate the surgeon’s educational background. Look at their medical school, plastic residency, and any fellowships completed. This provides insight into their formal education and training.

Continuous Learning

Surgeons need to stay updated with advancements. Check if they participate in continuous learning programs or attend workshops and seminars regularly. This shows commitment to staying current with plastic surgery techniques.

Specialty Register

Verify if the plastic surgeon is listed on a specialty register. This can include databases like the American Society of Plastic Surgeons (ASPS) or other recognized organizations. Being listed here means they adhere to strict guidelines and ethical practices.

Confirm Procedure Experience

Number of Procedures

Ask how many times the surgeon has performed the particular plastic procedure. This gives insight into their experience. A higher number often means more expertise. For instance, if you need a plastic rhinoplasty, ensure they have done it frequently.

Surgeons with more experience are likely to handle complications better. They can also provide realistic expectations. Knowing their history helps build trust.

Success Rates

Discuss the surgeon’s success rates for your specific procedure. Ask about any complications encountered. This information is crucial for making an informed decision.

Success rates vary between surgeons and procedures. Higher success rates indicate proficiency. Complications may still occur, but knowing them prepares you mentally.

Case Studies

Request case studies or examples similar to yours. Seeing past results can be reassuring. Look for before-and-after photos of previous patients.

Case studies help you understand what to expect. They showcase the surgeon’s skills and outcomes. Ensure these cases match your medical history and needs.

Assess Aesthetic Sense

Review Photos

Look at before and after photos of previous patients. Focus on those with similar physical attributes to yours. These photos show the surgeon’s skills and techniques. They help you understand the potential results.

Examine the photos for consistency. Consistent results indicate a high skill level. Diverse results show that the surgeon can handle different cases effectively.

Determine Approach

Decide if the surgeon’s aesthetic approach matches your desired outcome. Each surgeon has a unique style. Some prefer natural looks, while others may favor dramatic changes.

Discuss your aesthetic goals with the surgeon. Ensure they understand what you want. This conversation helps align expectations and outcomes.

Evaluate Portfolio

Consider the diversity and consistency of results in the surgeon’s portfolio. A diverse portfolio shows that the surgeon can adapt to various needs and preferences.

Check for consistent quality across all cases. Consistency indicates mastery of techniques and attention to detail. High-quality outcomes reflect well on the surgeon’s abilities.

Seek Opinions

Talk to former patients about their experiences. Ask if their appearance matched their expectations after surgery.

Read reviews online from multiple sources. Look for patterns in feedback about aesthetic satisfaction.

Evaluate Surgeon Rapport

Initial Consultations

Gauge your comfort level during initial consultations. Notice how the potential surgeon and their team interact with you. Do they make you feel at ease? This is important because you need to trust them with your body and life.

Observe if they respect your time. Are they punctual? Do they give you enough time to discuss your concerns? A good plastic surgeon values your time and ensures a thorough consultation.

Answering Questions

Assess the surgeon’s willingness to answer questions. Ask about their experience in medical specialties related to your procedure. They should provide detailed answers.

A competent surgeon explains the process clearly. They break down each step so you understand what to expect. This transparency builds trust and helps you make an informed decision.

Understanding Goals

Observe if the surgeon listens to and understands your goals. They should ask about your desired outcomes and any concerns you have.

An attentive doctor will tailor their approach based on your needs. They won’t rush through the consultation but will take time to ensure they’re aligned with your expectations.

Team Interaction

Evaluate how the surgeon’s team interacts with you. The staff should be friendly and professional. Their behavior reflects the overall environment of the clinic.

Friendly staff can help ease anxiety during the process. Professionalism indicates a well-run practice, which is crucial for successful outcomes.

Investigate Operating Facility

Accreditation

Check if the operating facility is accredited. Accreditation ensures safety standards are met. Look for certifications from reputable organizations. The American Association for Accreditation of Ambulatory Surgery Facilities (AAAASF) is one example. Accredited facilities follow strict guidelines to ensure patient safety.

Anesthetic Team

Ask about the qualifications of the anesthetic team. An experienced team can handle complications better. Verify their certifications and training. They should have credentials from recognized bodies like the American Board of Anesthesiology (ABA). This ensures they are well-trained.

Emergency Protocols

Verify the facility’s emergency protocols. Ask how they handle unforeseen complications. Well-prepared clinics have clear plans for emergencies. They should have necessary equipment and trained staff on hand. This can make a big difference in critical situations.

Research Reviews

Research reviews about the clinic and facility. Look at patient testimonials and ratings online. Check platforms like Healthgrades or RealSelf for feedback. Positive reviews often indicate good experiences with the facilities.

Facility Tour

Request a tour of the operating facility if possible. Seeing it firsthand gives you an idea of cleanliness and organization. A well-maintained clinic shows a commitment to hygiene and patient care.

Assess Customer Service

Responsiveness

Observe how quickly the office staff responds to inquiries. Prompt replies indicate a well-organized practice. During interactions, notice if they address your questions thoroughly. Professionalism in communication is crucial. Polite and respectful staff create a positive environment.

Professionalism

Evaluate the professionalism of the staff during your visits. They should be courteous and helpful at all times. It’s important that they provide clear information without rushing you. This shows they value your time and concerns.

Fee Transparency

Check if the provider explains all fees clearly. You should know about any potential additional costs upfront. Transparent pricing helps in avoiding unexpected expenses later on.

Educational Materials

Ensure the office provides educational materials for surgery preparation and recovery. These resources are essential for understanding what to expect before, during, and after surgery.

Follow-up Care

Assess the support provided for follow-up care after surgery. A good practice will have a structured plan for post-operative visits and care instructions. This includes checking on your recovery progress regularly.

Safety and Standards Adherence

Quality Outcomes

Ensure the surgeon has a track record of quality outcomes. Check before-and-after photos of previous patients. This will give you an idea of their skill level.

Look for reviews from past patients. Positive feedback often indicates successful results.

Minimum Criteria

Verify that the surgeon meets minimum criteria for safety standards. They should be board-certified by recognized institutions like the American Board of Plastic Surgery (ABPS).

Check if they have hospital privileges to perform surgeries. Hospitals have strict requirements, so this is a good indicator of competence.

Risks

Discuss potential risks with your surgeon. Understand what could go wrong during or after surgery.

Ask about anesthesia safety protocols. Ensure a certified anesthesiologist will administer it.

Realistic Expectations

Have a conversation about realistic expectations. A good surgeon will explain what can and cannot be achieved.

They should provide clear information on recovery times and possible complications.

Insurance

Check if your procedure is covered by insurance. Some reconstructive surgeries may be partially covered.

Understand the financial aspects before committing to surgery.

Handling Complications

Inquire about policies for handling complications or unsatisfactory outcomes. Know what steps they take if things don’t go as planned.

e surgeons offer revision surgeries at reduced costs or even free in certain cases.

Continuous Education

Assess the surgeon’s commitment to continuous education. They should regularly attend workshops and conferences to stay updated on the latest techniques.

Certification renewals are also crucial. These ensure they meet current medical standards and practices.

Make Your Decision

Reflect on Consultations

Reflect on the information gathered from consultations. Think about the questions you asked and the answers given. Consider how you felt during each meeting. Did the doctor make you feel comfortable? Trust is crucial in this journey.

Balance Cost and Experience

Consider the balance between cost and experience. A surgeon’s skill often correlates with their fees. However, higher cost doesn’t always mean better outcomes. Weigh your budget against the surgeon’s track record and expertise.

Comfort Level

Your comfort level with the surgeon is vital. You need to trust them fully. If there are any doubts or discomforts, it may affect your decision. Feeling at ease ensures a smoother process and confidence in your choice.

Pros and Cons List

Prepare a list of pros and cons for each surgeon you’re considering:

  • Experience: Years in practice, specialties.
  • Results: Before-and-after photos, patient testimonials.
  • Credentials: Board certifications, memberships in professional organizations.
  • Cost: Fees, payment plans.
  • Comfort: Personal rapport, communication style.

This list will help you see a clear picture of each option.

Verify Credentials

Verify that all potential surgeons are certified by reputable boards like the American Board of Plastic Surgery (ABPS). Check if they are members of recognized associations such as the American Society of Plastic Surgeons (ASPS). These credentials ensure they meet high standards.

Review Testimonials

Review patient testimonials and case studies. Look for consistent positive feedback about results and care quality. Real-life experiences can provide insight into what to expect.

Inspect Before-and-After Photos

Inspect before-and-after photos closely. These images show the surgeon’s work quality. Focus on cases similar to yours to gauge potential outcomes.

Ask Final Questions

Ask any final questions you might have before making a decision:

  • What is their complication rate?
  • How do they handle revisions if needed?
  • Can they provide more references?

These questions help clarify any remaining doubts.

Summary

Choosing the right plastic surgeon is crucial for your safety and satisfaction. You need to verify board certification, confirm procedure experience, and assess aesthetic sense. Evaluating the surgeon’s rapport and investigating the operating facility are also vital steps. Don’t forget to assess customer service and ensure adherence to safety standards.

Make an informed decision by following these guidelines. Your health and appearance are too important to leave to chance. Trust in your research and instincts. Ready to take the next step? Schedule consultations with top-rated surgeons today and secure the best care for your needs.

Frequently Asked Questions

How can I verify a plastic surgeon’s board certification?

Check the American Board of Plastic Surgery (ABPS) website. Ensure the surgeon is certified. This confirms they meet high standards in training and expertise.

Why is procedure experience important when choosing a plastic surgeon?

Experience ensures proficiency. Surgeons with extensive procedure-specific experience deliver better results and handle complications effectively.

How do I assess a plastic surgeon’s aesthetic sense?

Review before-and-after photos on their website. Look for consistency and results that match your desired outcome.

What should I consider when evaluating a surgeon’s rapport?

Ensure you feel comfortable discussing concerns. A good rapport builds trust and ensures clear communication throughout the process.

Why is investigating the operating facility crucial?

Accredited facilities adhere to strict safety standards. Verify accreditation by organizations like AAAASF or JCAHO for peace of mind.

How does customer service impact my choice of a plastic surgeon?

Responsive, helpful staff enhance your overall experience. Good customer service indicates the practice values patient satisfaction.

What are key elements of safety and standards adherence in plastic surgery?

Look for adherence to sterilization protocols, use of FDA-approved materials, and compliance with medical regulations to ensure your safety during procedures.

Fat Transfer Buttock Augmentation: Process, Benefits, and Safety

Key Takeaways

  • Understand the Procedure: Fat transfer buttock augmentation (BBL) uses your own body fat to enhance your buttocks, offering a natural look and feel, often performed by cosmetic surgeons as part of plastic surgery.
  • Consider the Benefits: BBL not only enhances buttock size but also contours other areas by removing excess fat, providing a dual benefit in plastic surgery.
  • Evaluate Candidate Suitability: Ideal candidates are those with enough body fat for transfer and who are in good overall health, as determined by patient selection and a cosmetic surgeon’s training and interest.
  • Compare Options: Unlike implants, BBL uses your own fat, reducing the risk of rejection and complications in plastic surgery by many surgeons.
  • Choose Wisely: Selecting a qualified and experienced cosmetic surgeon is crucial for achieving safe and satisfying results in plastic surgery, as many surgeons offer procedures like buttock implants.
  • Prioritize Safety: Follow all preoperative and post-operative instructions from your cosmetic surgeon to minimize risks and ensure a smooth recovery process.

Understanding Fat Transfer Buttock Augmentation

Brazilian Butt Lift (BBL)

Fat transfer buttock augmentation, a plastic surgery procedure, is often called the Brazilian Butt Lift (BBL). This procedure enhances the buttocks using a person’s own fat in some cases. It provides a fuller and more sculpted look.

Harvesting Fat

The process starts with harvesting fat from areas with excess fat, such as the butt. Common sites include the abdomen, thighs, or flanks. A surgeon uses liposuction to remove unwanted fat cells.

Next, the extracted fat undergoes processing. This step purifies subcutaneous fat and prepares it for injection into the buttocks, minimizing fat resorption and fat necrosis.

Injecting Fat

Surgeons then inject the purified fat into specific planes of the buttocks. They use small syringes to ensure even distribution. The goal is to create a natural-looking shape.

Natural Results

One major benefit of this procedure is its natural results in subcutaneous fat and butt without fat resorption or fat necrosis. The body accepts its own subcutaneous fat better than synthetic fillers. This leads to fewer complications.

Patients often report high satisfaction rates due to these natural outcomes, including fat resorption in the butt.

Longevity

The longevity of BBL results depends on several factors. One key factor is fat resorption, where some transferred fat in the butt gets absorbed by the body over time at a certain rate.

However, many patients retain about 60-80% of the injected fat cells in the butt long-term. Proper post-operative care can enhance these results.

Risks and Considerations

Every surgical procedure carries risks. One risk specific to BBL is fat necrosis. This occurs when some injected fat cells die and form hard lumps under the skin of the butt.

Proper technique by an experienced surgeon minimizes this risk significantly.

Exploring Benefits of BBL

Dual Benefits

Fat transfer buttock augmentation, also known as Brazilian Butt Lift (BBL), offers dual benefits. It reduces fat in donor sites and enhances the volume of the buttocks. This procedure involves liposuction to remove fat from areas like the abdomen, thighs, flanks, or butt. The extracted fat is then purified and injected into the buttocks.

Patients often appreciate this dual advantage. They achieve a slimmer appearance in problem areas while gaining a fuller, more rounded buttock shape. This combination makes BBL a popular choice for butt contouring.

Improved Body Contours

BBL significantly improves body contours and proportions. By removing excess fat from specific areas and adding it to the buttocks, patients can achieve a more balanced look. Many people aim for an hourglass figure, characterized by a narrow waist, fuller hips, and butt.

This procedure helps create that desired silhouette. Women who undergo BBL often report feeling more confident in their butt appearance. They find that clothing fits better and they enjoy a more proportionate body shape, including the butt.

Minimal Rejection Risk

Using the patient’s own fat from the butt minimizes the risk of rejection. Since the body recognizes its own cells, there is less chance of complications compared to implants or foreign materials. This makes BBL a safer option for many individuals.

The procedure’s use of autologous fat transfer ensures compatibility with the patient’s body, including the butt. Patients generally experience fewer allergic reactions or adverse responses during recovery. This aspect contributes to BBL’s popularity among those seeking natural butt enhancement solutions.

Enhanced Self-Esteem

Many patients experience enhanced self-esteem following BBL surgery. The improvement in physical appearance often leads to increased confidence and self-worth. Patients may feel happier with their overall look, including their butt, and more comfortable in social situations.

Real-life stories highlight how transformative this procedure can be emotionally, but. For example, some women have reported feeling empowered after achieving their desired body shape through BBL butt.

Long-Lasting Results

The results of BBL are typically long-lasting if patients maintain a stable weight and healthy butt lifestyle. Once the transferred fat cells establish blood supply in their new location, such as the butt, they become permanent parts of the body.

Patients can enjoy their enhanced figures for years without needing frequent touch-ups or additional butt surgeries.

Assessing Candidate Suitability

Adequate Fat Stores

Patients need adequate fat stores for successful fat transfer. The surgeon will harvest fat from areas like the abdomen, thighs, flanks, or butt. This process is called liposuction. Having sufficient donor fat ensures enough volume for the buttocks enhancement.

Not everyone has enough fat. Those with low body fat may not be good butt candidates. Surgeons assess this during consultations.

Good Skin Tone

Good skin tone in the hips and buttocks is crucial. Elastic skin helps achieve better results. Skin that sags or lacks elasticity may not hold the transferred fat well in the butt.

Patients with poor skin tone might need additional procedures. These could include skin tightening treatments.

Realistic Expectations

Patients must have realistic expectations about the outcomes. Fat transfer can enhance shape and volume but won’t create dramatic changes like butt implants might.

Surgeons discuss possible results during consultations. They show before-and-after photos to help patients understand what to expect for the butt.

Overall Health

Being in good health minimizes surgical risks. Candidates should be free from chronic conditions that could complicate surgery or recovery.

Non-smokers are preferred as smoking can affect healing. Surgeons often advise quitting smoking weeks before and after surgery, butting out for better recovery.

Time Commitment

Recovery time is essential to consider. Patients need time off work and daily activities to heal properly.

The initial recovery period lasts about two weeks. Full recovery can take several months, during which patients must follow post-op instructions carefully.

Comparing BBL and Implants

Natural Feel

BBL offers a natural feel. It uses your own fat for augmentation. This makes the buttocks soft and realistic to the touch.

Implants, on the other hand, use synthetic materials. They can sometimes feel firm or unnatural. Some people may notice the difference upon touch.

Appearance

BBL results in a more natural appearance. The fat is injected in small amounts to different areas, including the butt. This creates smooth contours that blend well with your body but butt.

Implants provide a more defined shape. They are ideal for those wanting a dramatic change. However, they might look less natural compared to BBL.

Risk of Complications

BBL has a lower risk of complications than implants. Since it uses your own fat, there is no risk of implant rupture or shifting in the butt.

Implants carry risks like rupture, infection, and shifting over time, especially in the butt. These complications may require additional surgeries to correct.

Subtle Enhancements

BBL is suitable for subtle enhancements. It works best if you want a modest increase in volume and better butt contouring.

Implants are better for significant volume increases. They can create a more noticeable change in size and shape, especially in the butt.

Recovery Time

Recovery from BBL is generally shorter and easier. Patients often experience less pain and discomfort post-surgery.

Implant surgery requires a longer recovery period. There may be more swelling and bruising involved.

Long-Term Results

BBL results can last many years if you maintain your butt weight. The fat cells integrate into your butt naturally over time.

Implants may need replacement after 10-15 years due to wear and tear or complications.

Candidate Suitability

Not everyone is a candidate for BBL or implants. Those with enough excess fat are ideal for BBL butt procedures.

People with low body fat might consider butt implants instead as they lack sufficient donor fat for BBL.

Choosing a Cosmetic Surgeon

Specialized Training

A cosmetic surgeon must have specialized training. This is crucial for fat transfer buttock augmentation. Fat transfer techniques require precision and skill. Many surgeons may offer this procedure, but not all have the right expertise.

Look for surgeons with extensive experience in fat transfer. They should have completed specific training programs. These programs focus on transferring fat safely and effectively.

Verifying Credentials

Always verify the surgeon’s credentials. Check if they are board-certified. Board certification ensures the surgeon meets high standards of practice. The American Board of Plastic Surgery (ABPS) is a reliable certifying body.

Membership in professional societies is also important. Organizations like the American Society of Plastic Surgeons (ASPS) or the Aesthetic Surgery Journal provide additional credibility. These memberships indicate ongoing education and adherence to ethical standards.

Reviewing Photos

Reviewing before-and-after photos is essential. These photos show the surgeon’s aesthetic style and results. Look for consistency in their work.

Pay attention to details in these photos:

  • Symmetry of the buttocks
  • Smoothness of skin
  • Natural appearance

Photos can help you understand what to expect from your surgery.

Patient Selection Criteria

Surgeons should follow strict patient selection criteria. Not everyone is a good candidate for fat transfer buttock augmentation. Factors like overall health, skin quality, and body type matter.

Discuss candidacy openly with your surgeon. They should explain why you are suitable or not suitable for the procedure.

Importance of Consultations

Consultations are crucial before making a decision. During consultations, ask questions about their experience and techniques used.

Questions to consider:

  1. How many fat transfer procedures have you performed?
  2. What complications have you encountered?
  3. Can I see more before-and-after photos?

These questions help gauge their expertise and comfort level with the procedure.

Real-Life Experiences

Real-life experiences from other patients can be insightful. Read reviews on reputable websites or forums dedicated to plastic surgery discussions.

e patients share detailed accounts of their journey:

  • Initial consultation experiences
  • Recovery process
  • Satisfaction with results

These stories can provide a realistic picture of what to expect.

Focusing on Safety

Accredited Facilities

Choosing accredited facilities is crucial. These places meet high safety standards. They follow strict guidelines set by medical boards. Patient safety remains the top priority.

Accredited facilities have trained staff. They use advanced equipment. This minimizes risks during surgery. Always check for accreditation before deciding on a clinic.

Pre-Surgical Assessments

Thorough pre-surgical assessments are vital. Doctors evaluate your health status. They check for any underlying conditions.

These assessments include blood tests and imaging studies. The goal is to identify potential complications early. This allows the surgeon to plan the procedure better.

Transparent Communication

Transparent communication with your surgeon is essential. Discuss all risks involved in fat transfer buttock augmentation.

Ask about possible side effects and recovery time. Knowing what to expect helps you prepare mentally and physically.

Understanding Danger Zones

Surgeons must understand danger zones in the body. Injecting fat into these areas can be risky.

The task force on patient safety highlights specific zones to avoid. Surgeons should stay updated on these guidelines to ensure safe procedures.

Techniques and Planes

Different techniques exist for fat transfer procedures. Surgeons inject fat at various planes within tissue layers.

Using proper techniques reduces complications. It ensures even distribution of transferred fat, which improves results and safety.

Post-Surgery Care

Post-surgery care is important for recovery. Follow your doctor’s instructions closely.

This includes taking prescribed medications and attending follow-up appointments. Proper care prevents infections and other issues after surgery.

Preparing for the Procedure

Optimal Health

Achieving optimal health before a surgical procedure is crucial. Many patients should maintain a stable weight. This helps in achieving better results from fat transfer buttock augmentation. Quitting smoking is also essential. Smoking can impair healing and increase complications.

Home Preparation

Preparing the home for post-operative care is vital. Patients should arrange for assistance during recovery. Having someone to help with daily tasks can be very beneficial. Creating a comfortable recovery area is also important. Ensure that the space has:

  • Easy access to necessities
  • Comfortable seating arrangements
  • Adequate pillows for support

This will make the recovery process smoother.

Preoperative Instructions

Following the surgeon’s preoperative instructions closely is necessary. Surgeons often provide specific dietary restrictions before procedures. These may include fasting or avoiding certain foods. Adjusting medications as advised by the doctor is also important.

Patients might need to stop taking blood thinners or certain supplements before surgery to reduce bleeding risks.

Anesthesia Options

Understanding anesthesia options is part of preparation. Fat transfer buttock augmentation typically involves local anesthesia, intravenous sedation, or general anesthesia. Discussing these options with the surgeon helps in making an informed decision.

Local anesthesia numbs only the surgical area while intravenous sedation relaxes the patient without full unconsciousness. General anesthesia puts the patient completely asleep during the procedure.

Managing Expectations

Managing expectations is key for many patients undergoing augmentation procedures like this one. Knowing what to expect can reduce anxiety and improve satisfaction with results. Discussing goals and outcomes with the surgeon helps align expectations with achievable results.

Recovery Insights

Typical Timeline

Recovery from fat transfer buttock augmentation varies. The initial rest period is crucial. For the first 48 to 72 hours, patients should rest and limit movement. Gradual return to normal activities begins after this.

By the end of the first week, light activities can resume. Full recovery usually takes about four to six weeks. However, it depends on individual cases.

Post-Operative Care

Following post-operative care instructions is vital. Patients must wear compression garments for six to eight weeks. These help reduce swelling and support new contours.

Avoiding direct sitting on the buttocks is essential for at least two weeks. Using a special pillow or cushion can help when sitting becomes necessary.

Managing Expectations

Managing expectations during healing is important. Temporary swelling occurs and may last several weeks. This is normal and part of the process.

The final shape will evolve over time. Fat resorption can affect results, with an average resorption rate of 30% to 40% within six months.

Monitoring Results

Monitoring results is key for satisfaction. Regular follow-ups with the surgeon ensure proper healing and address any concerns early on.

Most patients see significant improvements in their hip ratio by three months post-surgery. Final results are typically visible by six months to one year.

Enjoying Life Post-BBL

Enhanced Confidence

A BBL can boost self-esteem. Many patients feel more confident in their bodies after the procedure. Enhanced body confidence often leads to improved social interactions and a better quality of life. Embrace these positive changes.

Maintaining Results

Regular exercise helps maintain your new shape. Focus on activities that strengthen the glutes and hips, such as squats and lunges. A balanced diet is also crucial. Avoid weight fluctuations to keep your results consistent.

Healthy Lifestyle

Adopt a healthy lifestyle to enjoy long-lasting satisfaction with your BBL. This includes:

  • Eating nutritious foods
  • Staying hydrated
  • Getting enough sleep

These habits support overall well-being and help maintain your ideal waist size.

Long-Lasting Satisfaction

BBL results can be long-lasting if maintained properly. Follow your surgeon’s advice for post-operative care. Enjoy the new contours of your body and the confidence that comes with them.

Summary

Fat transfer buttock augmentation offers a natural way to enhance your curves, providing aesthetic benefits while utilizing your own body fat. Understanding the procedure, its benefits, and candidate suitability ensures you make an informed decision. Comparing BBL with implants, choosing a skilled surgeon, and focusing on safety are paramount.

Prepare for the procedure and recovery to enjoy life post-BBL fully. Ready to transform your silhouette? Consult a qualified cosmetic surgeon today and take the first step towards achieving your dream body. Your journey to enhanced confidence starts now!

Frequently Asked Questions

What is fat transfer buttock augmentation?

Fat transfer buttock augmentation, also known as Brazilian Butt Lift (BBL), involves transferring fat from other body areas to the buttocks. This enhances shape and volume naturally.

What are the benefits of a BBL?

A BBL offers natural-looking results, improved body contour, and dual benefits of liposuction. It uses your own fat, reducing allergy risks.

Who is a good candidate for BBL?

Ideal candidates are in good health, have sufficient fat deposits for transfer, and desire a natural enhancement. A consultation with a cosmetic surgeon will determine suitability.

How does BBL compare to implants?

BBL uses your own fat for a natural feel and look. Implants can provide more dramatic results but carry higher risks like infection or displacement.

How do I choose the right cosmetic surgeon?

Look for board-certified surgeons with extensive experience in BBL procedures. Check reviews, before-and-after photos, and ensure they prioritize patient safety.

What should I expect during recovery?

Expect swelling and bruising post-procedure. Avoid sitting directly on your buttocks for at least two weeks. Follow all aftercare instructions for optimal results.

Is fat transfer buttock augmentation safe?

When performed by a qualified surgeon, BBL is generally safe. However, it carries risks like any surgery. Ensure your surgeon follows best practices to minimize complications.

Tumescent Liposuction on the Legs: Preparation, Procedure, and Recovery

Did you know that tumescent liposuction for legs has a 90% satisfaction rate among patients? This popular procedure isn’t just about aesthetics; it’s about boosting confidence and comfort. Tumescent liposuction uses a special solution to make fat removal easier and safer, giving your legs a toned appearance. Whether you’re dealing with stubborn fat or aiming for smoother contours, this technique offers precise results with minimal downtime.

If you’re considering ways to enhance your leg shape, understanding tumescent liposuction is essential. It’s a trusted method among experts and patients alike. Discover how this advanced procedure can help you achieve the look you desire while ensuring safety and efficiency.

Key Takeaways

  • Preparation is Crucial: Thoroughly prepare for your tumescent liposuction procedure by following pre-operative guidelines to ensure optimal results and minimize complications.
  • Understand Anesthesia: Tumescent anesthesia is a key component of this technique, offering localized pain relief and reducing the need for general anesthesia, making the procedure safer.
  • Follow the Steps: Familiarize yourself with the step-by-step process of tumescent liposuction to know what to expect during the procedure and alleviate any concerns.
  • Patient Selection Matters: Not everyone is a candidate for tumescent liposuction. Proper patient selection and counseling are essential for achieving satisfactory outcomes and ensuring patient safety.
  • Post-Procedure Care: Adhering to post-procedure care instructions, including proper dressing, is critical to recovery and minimizing the risk of infection or other complications.
  • Recovery Timeline: Have realistic expectations about the recovery timeline and follow recommended guidelines to ensure a smooth and effective healing process.

Preparing for Your Procedure

Medical History

A thorough review of your medical history is crucial. The plastic surgeon needs to know about past surgeries, allergies, and current medications. This information helps ensure patient safety during the procedure.

Physical Examination

A physical examination will be conducted. The surgeon checks areas like the inner thigh where suction will occur. Blood pressure and other vital signs are monitored to detect any potential risks.

Quitting Smoking

Quitting smoking is essential before surgery. Smoking can increase the risk of complications such as bleeding and poor wound healing. Doctors usually recommend stopping smoking at least two weeks before the procedure.

Stopping Medications

Certain medications must be stopped before surgery. Blood thinners and anti-inflammatory drugs can increase bleeding risks. Always follow your doctor’s instructions on which medicines to stop.

Dietary Restrictions

Dietary restrictions are often necessary before surgery. Avoid eating or drinking after midnight on the day of the procedure if general anesthesia will be used. Following these guidelines helps prevent complications during surgery.

Choosing Clothing

Wear loose, comfortable clothing on the day of your surgery. Opt for clothes that are easy to remove and put back on after the procedure. This makes it easier for you post-surgery when you may experience discomfort or swelling.

Understanding Risks

Understanding the risks involved in tumescent liposuction is important. Common risks include swelling, bleeding, and infection at incision sites. Discuss these with your surgeon beforehand to be fully aware.

Injection Sites

The surgeon will make small incisions for injecting a solution containing epinephrine and anesthetics into targeted areas like the inner thigh. This minimizes discomfort during suction.

Post-Surgery Care

Post-surgery care is critical for recovery. Follow all aftercare instructions provided by your surgeon closely to minimize complications and promote healing.

Understanding Tumescent Anesthesia

How It Works

Tumescent anesthesia helps minimize pain and reduce bleeding during liposuction. A large volume of a diluted solution is injected into the fatty tissue. This solution causes the targeted area to become firm and swollen, making it easier to remove fat.

Solution Composition

The tumescent method uses a specific solution. This solution contains a local anesthetic called lidocaine. Lidocaine numbs the area, reducing pain during the procedure. Another important component is epinephrine. Epinephrine constricts blood vessels, which helps reduce bleeding and bruising.

Benefits of Tumescent Method

There are several benefits to using tumescent anesthesia:

  • Minimized Pain: The local anesthetic ensures that patients feel minimal discomfort.
  • Reduced Bleeding: Epinephrine in the solution reduces blood loss.
  • Less Bruising: Blood vessel constriction leads to less post-operative bruising.

Safety Aspects

Tumescent anesthesia is generally safer than general anesthesia for liposuction. Patients remain awake and alert during the procedure. This reduces risks associated with general anesthesia, such as respiratory complications.

Recovery Process

Recovery from tumescent liposuction is often quicker and smoother. Since patients are not under general anesthesia, they can go home sooner after the procedure. There are fewer side effects like nausea or grogginess.

Step-by-Step Guide to the Procedure

Injecting Solution

The first step involves injecting a tumescent solution into the legs. This solution contains saline, lidocaine, and epinephrine. The saline helps to swell the tissues, making fat removal easier. Lidocaine acts as a local anesthetic to numb the area. Epinephrine constricts blood vessels, reducing bleeding and bruising.

A small amount of this solution is injected into each targeted area. The solution prepares the stubborn fat for removal by breaking it down.

Making Incisions

After the tumescent solution has taken effect, small incisions are made in the skin. These incisions are usually less than half an inch long. They allow access for the cannula, a thin tube used for suctioning out fat.

Precision is crucial during this step. Surgeons carefully place incisions to minimize scarring and ensure even results.

Suctioning Fat

Next, the surgeon inserts a cannula through the incisions. The cannula is attached to a vacuum device that suctions out fat cells from beneath the skin.

This process requires skill and accuracy. The surgeon moves the cannula back and forth to break up and remove fat evenly. This technique helps contour the legs effectively.

Closing Incisions

Once all targeted fat has been removed, the incisions are closed with sutures or surgical tape. These closures help prevent infection and promote healing.

It’s important that these incisions are small to reduce recovery time and scarring.

Compression Garments

After closing the incisions, compression garments are applied to the legs. These garments provide support and help reduce swelling and bruising.

Patients typically wear these garments for several days post-procedure. They aid in shaping the legs as they heal.

Patient Selection and Counseling

Ideal Candidates

Many patients consider tumescent liposuction for their legs. Ideal candidates are in good health. They should have a stable body weight. This procedure is not for weight loss but for contouring.

People with elastic skin see better results. Good lymphatic function is also important. Poor lymphatic function can lead to complications. Patients must have realistic expectations about the outcomes.

Comprehensive Counseling

Counseling is crucial before the procedure. Doctors must explain the process clearly. This includes describing aspiration and insertion sites. Patients should know where the small incisions will be made.

Discuss potential outcomes and risks in detail. Explain that while satisfaction rates are high, there are no guarantees. Patients should understand that results vary based on individual factors.

Psychological Preparation

Psychological readiness is key to a successful surgery experience. Setting realistic goals helps manage expectations. Tumescent liposuction can improve body shape but has limitations.

Patients should understand that this surgery won’t drastically change their lives or solve personal issues. Understanding these limitations reduces post-surgery disappointment.

Post-Procedure Care and Dressing

Immediate Care

After tumescent liposuction of the legs, managing the effects of the local anesthetic is crucial. Patients might experience numbness for several hours. Dermatologic surgeons recommend resting immediately after the procedure to minimize discomfort. Elevating the legs can help reduce oedema.

Changing dressings regularly is important. The initial dressing should be kept on for at least 24 hours. Surgeons advise using sterile gauze to prevent infections.

Pain Management

Once the anesthetic wears off, patients may feel pain or soreness. Over-the-counter pain relievers like ibuprofen or acetaminophen are often recommended. These medications help manage inflammation and pain effectively.

Patients should avoid strenuous activities during this period. Resting helps in faster recovery and reduces complications.

Compression Garments

Compression garments play a significant role in post-procedure care. They help control swelling and support tissue healing. Wearing these garments as directed by your surgeon is essential.

These garments also aid in shaping the treated areas, preventing loose skin from developing. Typically, they should be worn continuously for at least two weeks.

Monitoring Oedema

Oedema or swelling is common after tumescent liposuction. It usually peaks within 48 hours post-surgery and gradually decreases over time. Keeping an eye on swelling levels is important.

Elevating the legs while resting can help reduce oedema faster. Drinking plenty of water also aids in reducing fluid retention in the body.

Reducing Blood Loss

Minimizing blood loss post-operation is vital for a smooth recovery. Following your surgeon’s instructions on activity restrictions can significantly help with this.

Avoiding alcohol and smoking during recovery is crucial as they can increase blood pressure and hinder healing processes.

Recovery Expectations and Timeline

Initial Phase

Expect the initial recovery time to span about one to two weeks. During this period, you may experience swelling and bruising. These symptoms are normal and should gradually decrease.

Light walking is encouraged early on. This helps improve circulation and reduces the risk of blood clots.

Swelling Reduction

Swelling can persist for several weeks. It typically peaks within the first few days after surgery. You might notice a significant reduction in swelling by the third week.

Compression garments play a crucial role here. They help reduce swelling and support your legs as they heal.

Resuming Activities

You can usually return to light activities within a week or two. However, avoid strenuous exercise for at least four to six weeks.

Listen to your body. If you feel pain or discomfort, give yourself more time to rest.

Final Results

Final results appear gradually over several months. Most patients see noticeable changes in three months, but full results can take up to six months.

Patience is key during this phase. Your body needs time to adjust and heal fully.

Tips for Enhancing Recovery

Follow these tips to enhance your recovery:

  • Engage in light walking: Start with short walks as soon as you feel comfortable.
  • Adhere to post-procedure instructions: Follow all guidelines provided by your surgeon.
  • Stay hydrated: Drink plenty of water to help flush out toxins.
  • Avoid smoking: Smoking can impair healing and increase complications.
  • Eat a balanced diet: Proper nutrition supports recovery and overall health.

Safety and Risks of Tumescent Liposuction

Safety advantages

Tumescent liposuction is safer than traditional methods. It involves injecting a large amount of diluted local anesthesia into the fat tissue. This technique reduces blood loss significantly. Patients lose less blood compared to traditional liposuction.

Using local anesthesia lowers the risks associated with general anesthesia. Patients remain awake during the procedure, which minimizes complications like nausea or breathing problems. Local anesthesia is safer for those with underlying health issues.

Common side effects

Side effects are usually mild and temporary. Swelling and bruising are common but subside within a few weeks. Some patients experience numbness in the treated area. This typically resolves on its own.

Infections can occur but are rare when proper hygiene is maintained. Antibiotics may be prescribed as a precautionary measure. Fluid accumulation under the skin, called seroma, might happen but can be drained easily.

Potential complications

Though rare, there are potential complications. Skin irregularities or contour deformities can occur if too much fat is removed unevenly. Ensuring a skilled surgeon performs the procedure reduces this risk.

Blood clots or deep vein thrombosis (DVT) are serious but uncommon risks. Early mobilization post-surgery helps reduce this risk. Allergic reactions to medications used during the procedure can also happen but are generally manageable with prompt medical attention.

Qualified surgeon

Choosing a qualified surgeon is crucial for minimizing risks. Look for board-certified plastic surgeons with extensive experience in tumescent liposuction. Check their credentials and patient reviews.

A reputable facility ensures better outcomes too. Accredited clinics follow strict safety protocols, reducing infection risks and ensuring proper patient care standards.

Alternative Techniques and Innovations

Laser-Assisted Liposuction

Laser-assisted liposuction is a newer technique. It uses laser energy to liquefy fat before removal. This method can be less invasive. It often results in quicker recovery times.

The laser energy also promotes skin tightening. This can lead to smoother results. However, it requires expertise to perform safely. There is a risk of burns if not done correctly.

Ultrasound-Assisted Liposuction

Ultrasound-assisted liposuction (UAL) employs sound waves. These waves break down fat cells for easier removal. UAL can be effective for dense areas of fat.

This technique may cause less trauma to surrounding tissues. Recovery time can be shorter compared to traditional methods. However, there are risks of burns and nerve injury.

Power-Assisted Liposuction

Power-assisted liposuction (PAL) uses a vibrating cannula. The vibration helps break up fat cells quickly. PAL is efficient for large amounts of fat removal.

It reduces the physical strain on surgeons. This can result in more precise work and optimal results. Patients might experience less bruising and swelling with PAL.

Comparing Effectiveness

Each technique has its pros and cons. Tumescent liposuction is known for safety and effectiveness. Alternatives like laser-assisted or UAL offer faster recovery but come with unique risks.

Tumescent liposuction involves injecting a solution into the area first. This numbs the area and reduces bleeding. Other techniques might not provide the same level of local anesthesia.

Safety Considerations

Safety varies among techniques. Tumescent liposuction is considered very safe due to minimal blood loss and local anesthesia use.

Laser-assisted and ultrasound-assisted methods carry risks like burns or nerve damage if not performed properly by an expert surgeon.

Recovery Times

Recovery differs across techniques too. Tumescent liposuction usually has moderate recovery time owing to swelling from the injected solution.

Laser-assisted methods might allow patients to return to normal activities sooner due to less tissue trauma, while ultrasound-assisted methods could vary based on individual factors.

Future Advancements

Research continues in the field of liposuction technology. Scientists are looking at ways to make procedures even safer and more effective.

Newer innovations include non-invasive fat reduction techniques using cold or heat therapy, which show promising results without surgery.

Summary

You’ve now got the lowdown on tumescent liposuction for legs. From prepping for the procedure to recovery tips, you’re all set. This method is a game-changer, offering precision and safety. You deserve the best results with minimal risks.

Ready to take the next step? Consult with your healthcare provider to see if tumescent liposuction is right for you. Your journey to smoother, more contoured legs starts now. Dive in and make an informed decision today!

Frequently Asked Questions

What is tumescent liposuction for legs?

Tumescent liposuction is a technique to remove fat from the legs. It involves injecting a large amount of diluted local anesthesia to numb the area and reduce bleeding.

How do I prepare for tumescent liposuction on my legs?

Follow your surgeon’s instructions. This may include avoiding certain medications, fasting, and arranging post-procedure transport.

What can I expect during the recovery period?

Expect some swelling and bruising. Wear compression garments as advised. Recovery usually takes a few weeks, but you can resume light activities sooner.

Are there any risks associated with tumescent liposuction?

Yes, like any surgery, it has risks such as infection, bleeding, or uneven results. Choosing an experienced surgeon minimizes these risks.

Who is an ideal candidate for tumescent liposuction on legs?

Ideal candidates are healthy individuals with stubborn leg fat that doesn’t respond to diet or exercise. A consultation will determine suitability.

How does tumescent anesthesia work in this procedure?

Tumescent anesthesia involves injecting a saline solution mixed with lidocaine and epinephrine into the targeted area. It numbs the area and reduces blood loss.

Are there alternative techniques to tumescent liposuction for legs?

Yes, alternatives include laser-assisted liposuction and ultrasound-assisted liposuction. Consult your surgeon to determine the best option for you.

Understanding Body Lift Scars: Formation, Care, and Management Techniques

Ever wondered how to deal with body lift scars after your surgery? Scars can be a major concern for anyone undergoing a body lift. They can affect not just your appearance but also your confidence. Understanding how to minimize and care for these scars is crucial.

This blog post dives into effective strategies and expert tips to help you manage body lift scars. From skincare routines to advanced treatments, we cover it all. Discover how you can achieve smoother, less noticeable scars and regain your self-assurance.

Key Takeaways

  • Follow Immediate Care Instructions: Adhere to your surgeon’s post-surgery care guidelines to minimize initial scar formation and promote healing.
  • Implement Short-Term Management: Use prescribed ointments and dressings to reduce inflammation and support the early stages of scar healing.
  • Adopt Long-Term Care Techniques: Incorporate daily moisturizing and sun protection to improve scar appearance over time.
  • Explore Advanced Scar Reduction: Consider treatments like laser therapy or silicone sheets for significant scar reduction if necessary.
  • Monitor and Manage Complications: Stay vigilant for signs of infection or abnormal scar development and consult your doctor promptly.
  • Set Realistic Expectations: Understand that while scars can be minimized, they cannot be completely erased; realistic expectations are key to satisfaction.

Understanding Scar Formation

Natural Healing Process

Scars form as part of the body’s natural healing process. When the skin is damaged, the body produces collagen fibers to repair it. These fibers form a scar.

Scar appearance can vary based on different factors. Some scars are flat and pale, while others may be raised or discolored.

Keloid Scars

Keloid scars extend beyond the original wound. They are thick and raised. These scars can be itchy or painful.

People with darker skin tones are more prone to keloids. Genetics also play a significant role in their formation.

Hypertrophic Scars

Hypertrophic scars remain within the boundaries of the original wound. They are raised but not as thick as keloids.

These scars may improve over time without treatment. However, they can still be noticeable and cause discomfort.

Contracture Scars

Contracture scars occur when the skin tightens during healing. This type often results from burns.

Scar visibility increases with contracture scars because they limit movement in the affected area.

Individual Factors

Genetics greatly influence how a person scars. Some people naturally produce more collagen than others.

Age also affects scar formation. Younger individuals tend to heal faster but may develop thicker scars.

The location of the surgery impacts scarring too. Areas with more tension, like joints, may have more prominent scars.

Immediate Care Post-Surgery

Clean Incision Area

Keeping the incision area clean is crucial. This helps prevent infection. Use mild soap and water to gently clean the area. Do not scrub vigorously. Pat dry with a clean towel.

Your doctor will provide specific instructions. Follow them closely. They may recommend an antiseptic solution. Apply it as directed.

Medications for Pain and Inflammation

Medications play a vital role post-surgery. Pain and inflammation are common in the first 48 hours. Doctors often prescribe painkillers and anti-inflammatory drugs.

Take these medications exactly as prescribed. Do not skip doses. This helps manage discomfort effectively.

Managing Sutures and Wound Care

Sutures need proper care to ensure healing. Avoid pulling or tugging at them. Keep the area dry when possible.

Your doctor might give you ointments to apply on sutures. These help in reducing irritation and promote healing.

Following Specific Instructions

Post-surgical instructions are essential for optimal recovery. These include guidelines on activity levels, diet, and wound care.

Rest is important in the initial days post-surgery. Avoid strenuous activities that might strain your body.

Monitoring Incision Lines

Regularly check your incision lines for any signs of infection. Redness, swelling, or unusual discharge should be reported immediately to your doctor.

Short-Term Scar Management

Wound Dressing

Proper wound dressing is crucial in the first 2 to 4 weeks after surgery. It helps protect the wound from infection and supports the healing process. Clean the wound daily with mild soap and water. Apply a new, sterile dressing each time.

Use non-stick dressings to avoid irritating the wound. Change the dressing if it becomes wet or dirty. Keeping the area clean prevents complications and promotes faster recovery.

Topical Products

Topical products can aid in early scar minimization. Silicone gels and sheets are popular choices. They help flatten and soften scars over time.

Hydrogel sheets provide moisture, which aids in wound healing. These products reduce itching and discomfort as well. Apply them as directed for best results.

Antibacterial ointments like Neosporin can prevent infections during early stages. However, consult your doctor before using any product on surgical wounds.

Hydration and Nutrition

Maintaining hydration is vital for recovery. Drink plenty of water throughout the day to keep your skin hydrated from within.

Nutrition plays a key role too. Consume foods rich in vitamins A, C, and E to support tissue repair. Protein-rich foods like chicken, fish, and beans help rebuild collagen fibers in scar tissue.

Avoid sugary snacks and processed foods, which can slow down healing processes. A balanced diet speeds up recovery and improves overall health.

Limited Physical Activity

Limiting physical activity is essential during recovery. Avoid strenuous exercises that may strain the surgical area. Gentle movements like walking can promote blood flow without causing harm.

Rest is equally important. Ensure you get enough sleep each night to allow your body to heal properly.

By following these steps, you can effectively manage visible scars in the short term:

  1. Maintain proper wound dressing.
  2. Use recommended topical products.
  3. Stay hydrated and eat nutritious meals.
  4. Limit physical activities to gentle movements only.

These practices will help ensure a smoother recovery process while minimizing scarring over time.

Long-Term Scar Care Techniques

Scar Massage and Moisturizing

Scar massage helps in breaking down scar tissue. It can improve flexibility and reduce tightness. Use gentle, circular motions with your fingers. Do this for a few minutes every day.

Moisturizing keeps the skin hydrated. This promotes healing and reduces itching. Choose a moisturizer with ingredients like vitamin E or aloe vera. Apply it twice daily for best results.

Sun Protection Benefits

Protecting scars from the sun is crucial. UV rays can darken scars and make them more noticeable. Always use sunscreen with at least SPF 30 on exposed scars.

Wearing protective clothing also helps. Hats, long sleeves, and scarves can shield scars from direct sunlight. This prevents discoloration and promotes even skin tone.

Advanced Care Options

e advanced treatments can improve scar appearance:

  • Laser treatments: These target scar tissue with focused light beams. They reduce redness and smooth out the texture.
  • Microneedling: Tiny needles create small punctures in the skin. This stimulates collagen production and improves skin elasticity.

Consult a dermatologist for these procedures. They will assess your scar type and recommend the best treatment plan.

Advanced Scar Reduction Methods

Steroid Injections

Steroid injections help reduce scar tissue. They work by softening and flattening the raised areas of scars. Doctors often use this method for keloids and hypertrophic scars. The process involves injecting corticosteroids directly into the scar.

Patients may need several sessions. Each session is spaced a few weeks apart. This method is effective in reducing inflammation and redness.

Derma-Rolling

Derma-rolling, also known as microneedling, can improve scar appearance. It uses tiny needles to create micro-injuries in the skin. These injuries stimulate collagen production, which helps in skin repair.

The procedure is usually done by a dermatologist. Patients might experience mild discomfort during the process. Over time, derma-rolling can make scars less noticeable and smoother.

Vitamin E Oil

Vitamin E oil is a popular natural remedy for scars. It contains antioxidants that promote skin healing. Applying it regularly can soften scar tissue and improve texture.

e studies show mixed results on its effectiveness. However, many people find it beneficial for minor scars.

Onion Extract Gels

Onion extract gels are another natural option for scar care. These gels contain compounds that reduce inflammation and inhibit collagen production in excess amounts.

Applying onion extract gel daily can help lighten scars over time. Some people see visible improvements within a few months of consistent use.

Acupressure Benefits

Acupressure involves applying pressure to specific points on the body. This technique can help manage scar sensitivity and pain. By targeting certain points, acupressure may also improve blood flow around the scar area.

Many patients report reduced itching and discomfort after acupressure sessions. It’s a non-invasive way to support scar healing.

Acupuncture Potential

Acupuncture uses thin needles inserted into the skin at specific points. This ancient practice aims to balance energy flow in the body, which can aid in healing processes.

For scars, acupuncture might reduce pain and inflammation. Some studies suggest it could improve overall skin health by enhancing circulation around the affected area.

Managing Complications

Common Issues

Patients may experience several complications with body lift scars. Keloids are raised scars that grow beyond the wound site. They can be itchy and uncomfortable. Contractures occur when the skin tightens around the scar, limiting movement. Pigmentation issues may cause the scar to appear darker or lighter than the surrounding skin.

Surgical Revision

Surgical revision is a solution for severe scar complications. Surgeons remove the old scar tissue and close the wound again. This can improve both appearance and function. Patients should discuss potential risks with their doctors before opting for this procedure.

Laser Therapy

Laser therapy is another effective treatment for managing scars. Lasers target pigment in the scar, reducing its visibility. This method also stimulates collagen production, which helps flatten raised scars like keloids. Multiple sessions may be required for best results.

Proper Care

Proper care plays a crucial role in managing body lift scars. Keeping the area clean and moisturized aids in faster healing. Avoiding sun exposure prevents pigmentation changes. Patients should follow their doctor’s advice on wound care to reduce infection risks.

Professional Help

Seek professional help if complications arise during recovery. Signs of infection, such as redness, swelling, or pus, require immediate attention. Persistent pain or changes in scar appearance also warrant a visit to your healthcare provider.

FAQs on Body Lift Scars

Healing Timeline

Body lift scars usually take time to heal. Initially, they appear red and raised. Over the first few months, they start to fade and flatten. Most scars mature between 12 to 18 months post-surgery.

Scar Permanence

Scars from a body lift are permanent. However, their appearance can improve over time. Treatments like silicone sheets or gels may help reduce scar visibility. Lasers and microneedling are also effective options.

Treatment Effectiveness

Various treatments can help improve the look of body lift scars. Silicone sheets are often recommended by doctors. These sheets keep the scar hydrated and reduce its size. Laser therapy targets pigmentation and helps smoothen the skin.

Lifestyle Factors

Lifestyle choices impact scar healing. Smoking slows down the process and can worsen scar appearance. A balanced diet rich in vitamins aids in faster recovery. Staying hydrated also helps maintain skin elasticity.

Post-Operative Care

Proper care after surgery is crucial for better scar outcomes. Keep the surgical area clean to avoid infections that can worsen scars. Follow your surgeon’s advice on wound care and avoid strenuous activities.

Emotional Impact

Scars can have an emotional effect on patients. Some people feel self-conscious about their appearance post-surgery. Support groups or counseling can be beneficial for coping with these feelings.

Setting Realistic Expectations

Inevitability of Scars

Scars are an inevitable part of body lift surgery. The location and size of the scars depend on the type of lift performed. Factors such as skin type, age, and genetics influence scar appearance. People with darker skin may have more noticeable scars.

The healing process can take several months to a year. Initial redness and swelling are common. Over time, scars should fade and become less visible.

Patience and Care

Achieving optimal results requires patience. Consistent care is crucial during the healing process. Follow your surgeon’s guidelines for wound care.

Use recommended products to aid in scar healing. Silicone sheets or gels can reduce scar visibility. Protecting scars from sun exposure is essential.

Patience is key to seeing improvement over time.

Open Communication

Open communication with your surgeon is vital. Discuss potential outcomes before surgery. Understand that complete scar removal is not possible.

Ask about techniques to minimize scarring. Surgeons may use specific suturing methods to reduce scar size. Knowing what to expect helps set realistic expectations.

Closing Thoughts

Caring for body lift scars is a journey. From immediate post-surgery care to advanced scar reduction methods, your dedication can significantly impact the healing process. Stay informed, patient, and proactive in managing your scars.

You’ve got the tools and knowledge now. Embrace realistic expectations and prioritize your well-being. If you have more questions or need personalized advice, don’t hesitate to consult with your healthcare provider. Take charge of your recovery today!

Frequently Asked Questions

How long do body lift scars take to heal?

Body lift scars typically take 6-12 months to mature. Initial healing occurs within a few weeks, but full scar maturation can take up to a year.

Can I prevent body lift scars from forming?

While you can’t completely prevent scars, proper wound care, hydration, and avoiding sun exposure can minimize their appearance.

What are the best products for scar reduction?

Silicone gel sheets and creams are highly recommended for reducing scar visibility. They help by hydrating the scar tissue and promoting smoother skin.

Is it normal for body lift scars to be red?

Yes, it’s normal. Scars often start as red or pink and gradually fade over time. Persistent redness may require medical evaluation.

When should I worry about my body lift scars?

If your scars are painful, excessively swollen, or show signs of infection (like pus), consult your surgeon immediately.

Can laser treatments help with body lift scars?

Yes, laser treatments can significantly reduce the appearance of body lift scars. Consult a dermatologist for personalized advice.

Will my scars ever completely disappear?

Scars will fade but rarely disappear entirely. Proper care and advanced treatments can make them less noticeable over time.

Buffalo Hump Liposuction Before and After: Recovery & Results

Did you know that 70% of people with a buffalo hump, a condition often seen in females, seek cosmetic solutions due to its prominence? Buffalo hump liposuction before and after results can be life-changing for female patients with prominence. This procedure targets the stubborn fat deposit at the back of your neck, enhancing your posture and confidence through buffalo hump lipo. Many individuals, particularly females, struggle with this issue, often feeling self-conscious about their appearance and considering buffalo hump lipo for hair removal.

Buffalo hump liposuction offers a quick fix to this problem. The procedure is straightforward, and recovery is typically swift. Imagine seeing significant improvements in just a few weeks! This blog post will cover everything you need to know about buffalo hump liposuction, from preparation to recovery, ensuring you’re well-informed before making any decisions.

Key Takeaways

  • Effective Solution: Buffalo hump liposuction is a proven method to remove excess fat from the upper back, offering a more contoured appearance.
  • Procedure Clarity: The step-by-step guide provides a clear understanding of what to expect during the surgery, ensuring patients are well-prepared.
  • Visual Evidence: The before and after photos in the visual gallery highlight the significant improvements and potential results of the buffalo hump lipo procedure.
  • Recovery Tips: Following the outlined recovery journey can help minimize downtime and ensure a smoother healing process.
  • Consultation Importance: Consulting with a qualified surgeon is crucial for understanding personalized risks, benefits, and costs associated with the procedure.
  • Cost Factors: The cost explained section breaks down the financial aspects, helping patients budget and plan for the procedure effectively.

Understanding the Procedure

PRECISION SCULPT® Technique

The PRECISION SCULPT® technique uses a combination of laser and radiofrequency energy. This method targets fat cells precisely. It breaks down fat deposits effectively. The laser melts the fat, making it easier to remove. Radiofrequency tightens the skin after fat removal.

This dual approach ensures better results. Patients notice smoother contours and less sagging skin. The procedure is minimally invasive. Recovery time is shorter compared to traditional methods.

Awake Liposuction

Awake liposuction happens under local anesthesia. Patients stay awake during the procedure. This increases safety and comfort. There are fewer risks compared to general anesthesia.

Local anesthesia numbs only the treatment area. Patients can communicate with the surgeon throughout the process. This makes adjustments possible in real-time, enhancing precision.

Awake liposuction also reduces recovery time. Patients experience less nausea and dizziness post-surgery. They can return to daily activities sooner.

Dorsocervical Fat Pad Focus

Removing the dorsocervical fat pad is crucial for treating a buffalo hump. This fat pad accumulates at the back of the neck and upper back area. It creates a noticeable bulge, affecting appearance and posture.

Surgeons focus on this specific area during buffalo hump liposuction. Precision Sculpt® helps in targeting this localized fat deposit accurately.

Patients often feel relief from physical discomfort after removing this fat pad. Improved posture and reduced neck strain are common benefits.

Step-by-Step Guide

Initial Consultation

The first step is the initial consultation. This meeting with the surgeon determines if an individual is a good candidate for buffalo hump liposuction. Doctors evaluate the size and location of the hump. They also check overall health and medical history.

Patients discuss their goals during this visit. Surgeons explain what to expect from the procedure. They may take photos of the back and neck for reference.

Preparation Steps

Preparation begins weeks before surgery. Patients might need to adjust their diet or medications. Doctors often advise stopping blood thinners like aspirin a week before surgery.

Smoking can affect healing, so patients should stop smoking at least two weeks before and after surgery. Eating a balanced diet helps in faster recovery.

Procedure Day

On the day of the procedure, patients arrive at the clinic or hospital early. A nurse checks vital signs like blood pressure and heart rate.

Before starting, doctors mark areas on the back and neck where they will perform liposuction. Anesthesia options include local anesthesia for smaller humps or general anesthesia for larger ones.

During the procedure, surgeons make small incisions near the hump. A thin tube called a cannula is inserted through these incisions to remove excess fat. The process usually takes one to two hours.

Immediate Post-Operative Care

After surgery, patients spend some time in a recovery room. Nurses monitor vital signs as anesthesia wears off.

Surgeons provide detailed post-operative care instructions. These often include wearing compression garments around the back and neck to reduce swelling.

Patients should avoid strenuous activities for at least two weeks post-surgery. Light walking is encouraged to improve blood circulation.

Visual Gallery

Before Photos

These images show patients before buffalo hump liposuction. The buffalo hump area is visible on the upper back. Patients often feel self-conscious about this appearance.

One common feature is the accumulation of fat tissue at the lower neck. This can be due to various reasons, including genetics and weight gain.

After Photos

The after photos highlight the results of buffalo hump liposuction. The difference in appearance is clear. The upper back and lower neck areas look more sculpted.

Patients report feeling more confident post-procedure. The contour of their upper back significantly improves.

Technique Showcase

The PRECISION SCULPT® technique is used for these transformations. It targets specific fat deposits with high accuracy. This method ensures minimal damage to surrounding tissues.

Patients benefit from a quicker recovery time compared to traditional methods. The precision allows for better sculpting of the affected area.

Female Patients

Female patients often seek this procedure for aesthetic reasons. They want a smoother contour on their upper back. Many women experience significant improvement in their posture and overall silhouette.

Before and after photos of female patients show dramatic changes. Their upper backs appear more streamlined and natural-looking.

Male Patients

Male patients also undergo this procedure for similar reasons. They aim to remove excess fat from their upper backs and lower necks.

After photos reveal a more defined upper body structure. Men report increased comfort in daily activities and improved self-esteem.

Recovery Days

Recovery typically takes a few days to weeks, depending on individual cases. Post-surgery care includes managing swelling and bruising around the treated area.

Patients usually return to normal activities within a week or two. Following proper aftercare instructions speeds up healing time.

Skin and Hair Care

Post-procedure skin care is crucial for optimal results. Keeping the skin moisturized aids in recovery and reduces scarring risks.

Hair around the treated area should be kept clean to prevent infections. Proper hygiene helps maintain the health of both skin and hair during recovery.

Diverse Profiles

This gallery showcases patients from various backgrounds and body types. Each person has different needs, but all benefit from buffalo hump liposuction.

The variety demonstrates that this procedure works across diverse profiles effectively. Every patient shows noticeable improvement in their upper back contours post-surgery.

Recovery Journey

Immediate Phase

Patients often experience swelling and bruising after buffalo hump liposuction. The surgeon usually makes a small skin opening to insert the cannula. This opening needs proper care to prevent infections. Clean the area daily and apply prescribed ointments. Swelling typically peaks within 48 hours but starts reducing afterward.

First Week

During the first week, patients should rest as much as possible. Avoid strenuous activities. Some discomfort is normal, but pain can be managed with medication. Wearing a compression garment helps reduce swelling and supports healing. Most patients notice reduced bruising by the end of this week.

Two Weeks Later

By the second week, many patients start feeling better. Swelling continues to decrease, and mobility improves. Light activities like walking are encouraged to promote blood flow. However, avoid heavy lifting or intense exercise until cleared by your doctor.

Returning to Work

Recovery time varies between individuals. Generally, patients can return to work within one to two weeks post-procedure. Desk jobs may require less downtime compared to physically demanding jobs. Always follow your surgeon’s advice on when it’s safe to resume normal activities.

Full Recovery

Complete recovery from buffalo hump liposuction can take several months. Most swelling subsides within six weeks, but final results may not be visible until three to six months later. During this period, continue following post-operative care instructions for optimal results.

Patient Testimonials

Many patients share positive recovery experiences after buffalo hump liposuction:

  • Sarah: “I was back at my desk job in ten days! The first few days were tough, but wearing the compression garment made a big difference.”
  • John: “The support from my healthcare team was incredible. They guided me through each step of recovery.”
  • Emily: “Seeing the before and after photos kept me motivated during recovery.”

These testimonials highlight the importance of comfort and support throughout the process.

Lasting Results

Permanent Change

Buffalo hump liposuction can provide a permanent change. The key is maintaining a stable weight and healthy lifestyle. Excess fat in the buffalo hump region is removed during the procedure. This means that if weight remains steady, the results are long-lasting.

Before and After

Long-term before and after images show sustained results. Patients often see a significant reduction in the prominence of the buffalo hump. These images highlight how effective buffalo hump lipo can be. They also demonstrate how important it is to maintain results through proper care.

Improved Posture

Patients frequently report improved posture after the procedure. Removing excess fat from the neck and upper back allows for better alignment. This improvement can reduce discomfort and enhance overall well-being.

Boosted Confidence

Many patients experience increased confidence following buffalo hump liposuction. They feel more comfortable with their appearance. This boost in self-esteem often leads to positive changes in other areas of life as well.

Consultation Insights

Goals and Expectations

A thorough consultation is crucial. It sets the stage for successful buffalo hump liposuction. Patients discuss their goals and expectations with the surgeon.

Clear communication helps manage outcomes. Surgeons explain what the procedure can achieve. They also outline any limitations.

Procedure Details

Surgeons provide detailed information about the surgery. This includes how they will make incisions to remove excess fat.

They may use local or general anesthesia. The choice depends on individual cases. Recovery time and potential risks are also discussed.

Common Questions

Patients often have many questions during the consultation phase. They might ask about the duration of the surgery.

Others inquire about possible side effects or complications. Knowing these details helps patients feel more prepared.

Addressing Concerns

Concerns about pain and scarring are common. Surgeons reassure patients by explaining techniques used to minimize discomfort.

They also discuss how small incisions lead to less noticeable scars. This can ease patient anxiety significantly.

Preparing for Consultation

Preparation is key for a productive consultation. Patients should bring medical history records.

Listing current medications is also important. These details help surgeons plan safely and effectively.

Important Questions to Ask

Patients should prepare a list of questions for their consultation:

  • What are the realistic results?
  • How long is the recovery period?
  • Are there any specific risks?

Asking these questions ensures all concerns are addressed before proceeding with surgery.

Cost Explained

Factors Influencing Cost

Several factors influence the cost of buffalo hump liposuction. The technique used is a significant factor. Traditional liposuction may be less expensive than advanced methods like laser-assisted liposuction.

Procedural complexity also affects the cost. A more complex case requires longer surgery time and greater expertise, which can increase expenses.

Geographic location matters too. A procedure in a major city often costs more due to higher living expenses and demand for services.

Cost Range

The cost of buffalo hump liposuction varies widely. On average, it ranges from $2,000 to $8,000. This range depends on the factors mentioned earlier.

e clinics offer financing options or payment plans to help manage costs. These options can make the procedure more accessible for those who need it but cannot pay upfront.

Inclusions in Procedure Cost

Understanding what is included in the procedure cost is important. Most fees cover:

  • Pre-operative consultations
  • Surgeon’s fee
  • Anesthesia charges
  • Operating room costs

Follow-up care is usually included as well. This ensures proper healing and addresses any complications that may arise after surgery.

Necessary garments, such as compression garments, are often part of the total cost. These garments help reduce swelling and support healing post-surgery.

Downtime Expectations

Quick recovery

Most patients experience a quick recovery after buffalo hump liposuction. They can usually return to daily activities within a few days. Some people might need a week off work, but this varies.

Following the procedure, it’s common to feel some swelling and bruising. These symptoms typically subside within two weeks. Patients should avoid strenuous activities during this period.

Virtual follow-ups

Virtual follow-up appointments play a crucial role in minimizing downtime. Doctors can monitor progress without requiring in-person visits. This convenience allows patients to recover comfortably at home.

These virtual check-ins help address any concerns promptly. They ensure that the healing process is on track and reduce the need for extra trips to the clinic.

Minimal scarring

Buffalo hump liposuction results in minimal scarring. The incisions are small and usually hidden in natural skin folds. This discreet nature of the scars makes it easier for patients to resume their social and professional lives without noticeable marks.

Proper post-operative care is essential for optimal healing. Following the surgeon’s instructions helps minimize scarring even further.

Seamless return

The recovery from buffalo hump liposuction allows for a seamless return to normal life. Most people can go back to their usual routines quickly, including work and social activities.

Patients often feel more confident once the swelling reduces and they see the final results. The quick recovery time ensures minimal disruption to their daily schedules.

Final Remarks

By now, you should have a solid grasp of what buffalo hump liposuction entails. You’ve seen the transformation through before-and-after photos, learned about the steps, and understood the recovery process. This procedure can significantly boost your confidence and improve your quality of life.

Ready to take the next step? Schedule a consultation with a qualified specialist to discuss your options. Your journey towards a smoother silhouette starts here. Take action today and embrace a new, confident you!

Frequently Asked Questions

What is buffalo hump liposuction?

Buffalo hump liposuction is a cosmetic procedure to remove excess fat from the upper back and neck area. It helps in reshaping the affected region for a more balanced appearance.

How long does the recovery take?

Recovery typically takes about 1-2 weeks. Most patients can resume normal activities within a few days but should avoid strenuous exercise for at least two weeks.

Are the results permanent?

Yes, the results are generally permanent if you maintain a stable weight and healthy lifestyle. Fat cells removed during liposuction do not return.

Is buffalo hump liposuction painful?

The procedure is performed under anesthesia, so you won’t feel pain during surgery. Post-operative discomfort is manageable with prescribed medication.

What are the risks involved?

Risks include infection, bruising, swelling, and uneven contours. Choosing an experienced surgeon minimizes these risks significantly.

How much does buffalo hump liposuction cost?

Costs vary based on location and surgeon expertise, typically ranging from $2,000 to $8,000. Consultations provide personalized estimates.

Do I need a consultation before the procedure?

Yes, a consultation is essential to assess your suitability for the procedure and discuss expectations and potential outcomes with your surgeon.

CoolTone®: Process, Results & What to Expect

Understanding CoolTone

Noninvasive Technology

CoolTone is a noninvasive technology. It targets muscle toning in the abdominal muscles, buttocks, and thighs. This means there are no cuts or needles involved. The procedure uses magnetic muscle stimulation (MMS). MMS sends electromagnetic energy to muscles. This energy causes the muscles to contract.

FDA Clearance

The FDA has cleared CoolTone for several purposes. These include improving abdominal tone and strengthening muscles. It also helps develop a firmer body. The clearance ensures that the treatment is safe and effective, providing important safety information from a licensed physician for medicines and patient results. Before getting the procedure, consult with a medical professional.

Results Variability

Results from CoolTone can vary between individuals. Ariel had noticeable results within four weeks. She felt her abs were much tighter and stronger. Raiza, however, took six weeks to see changes and improvement in her thighs, buttocks, and skin.

Both experiences show that results depend on various factors:

  • Your body’s response to the treatment
  • Your initial muscle tone
  • How often you undergo sessions

CoolTone Mechanism Explained

AMP™ Technology

CoolTone uses AMP™ (Active Magnetic Pulse) technology. This technology stimulates muscle contractions. It sends magnetic pulses to the muscles. These pulses cause the muscles to contract rapidly.

These contractions are more intense than regular workouts. They help in toning and firming the muscles effectively. The process is non-invasive, meaning it does not require surgery, needles, an injection site, or pain.

Intensive Workouts Mimicked

CoolTone mimics intensive workout sessions. It targets specific muscle groups from the outside. This includes areas like the abdomen, buttocks, and thighs.

The machine causes thousands of muscle contractions in a single session without pain or serious side effects. This is similar to doing many sit-ups or squats quickly, causing chin pain and side effects like an injection. These contractions help build muscle strength and improve tone.

Development Insights

CoolTone was developed with insights from experts in muscle science and important safety information from specialists. Research on athletic performance also played a significant role.

Scientists studied how muscles respond to different types of stimulation, including skin injection. They found that magnetic pulses could effectively stimulate muscle growth and strength.

Treatment Process Overview

Consultation

The CoolTone treatment begins with a consultation. During this session, the provider assesses the patient’s goals. They examine the treatment area to determine suitability. The patient receives information about what to expect during and after the treatment, including side effects, safety, and injection.

Preparation

Before starting, patients lie down on a comfortable table. The provider cleans the skin of the treatment site. No special clothing is required, but patients should wear something comfortable and discuss important safety information with their doctor.

Application

A CoolTone device is placed on the treatment area. This device sends electromagnetic pulses to stimulate muscle contractions. These contractions are more intense than those achieved through exercise, injection, or products with important safety information and side effects.

Duration

Each CoolTone session lasts about 30 minutes per treatment area, and the doctor will discuss any side effects. Patients might feel their muscles contracting strongly but without pain, as a side effect of the injection, according to safety information.

Sensations

During treatments, patients experience strong muscle contractions. Some describe it as feeling like an intense workout. There is no need for anesthesia or numbing agents.

Post-Treatment

After completing a session, patients can resume normal activities immediately without any side effects from the injection. There is no downtime required since it’s a non-surgical injection procedure.

Preparing for CoolTone

Pre-treatment Guidelines

Patients should follow certain guidelines before undergoing CoolTone. Avoid taking anti-inflammatory medications like ibuprofen or aspirin at least 24 hours before the injection session. These medications can thin the blood and increase the risk of bruising; use this information wisely. Refrain from alcohol consumption as it can also affect blood flow and increase bruising, according to information.

Ensure you are hydrated. Drinking plenty of water helps your muscles respond better to treatment. Wear comfortable clothing to your appointment. Loose-fitting clothes make it easier for the practitioner to access the treatment areas.

Checking Contraindications

Certain medical conditions may disqualify someone from CoolTone treatments. People with metal implants in the treatment area should avoid this procedure due to possible interference with magnetic pulses and information. Individuals with pacemakers, defibrillators, or other electronic devices should not use CoolTone information.

Check for conditions like cold agglutinin disease or cold hemoglobinuria, which could be exacerbated by the cooling effect of the device; this information is crucial. Pregnant women and individuals with severe muscle issues should consult their doctor for information before considering this treatment.

Lifestyle Adjustments

Making lifestyle adjustments can enhance the effectiveness of CoolTone treatments with the right information. Incorporate regular exercise into your routine to improve muscle tone and overall health. Focus on exercises that target areas you plan to treat, such as abdominal workouts for better abdominal tone or leg exercises for banana roll correction.

Maintain a balanced diet rich in protein to support muscle growth and repair. Foods like lean meats, fish, eggs, and legumes are excellent choices. Avoid high-sugar and high-fat foods that can hinder muscle development.

Dietary Recommendations

Specific dietary changes can help maximize CoolTone results. Increase your intake of fruits and vegetables to provide essential vitamins and minerals that support muscle function. Stay away from processed foods that offer little nutritional value.

Consider supplements like magnesium and potassium if recommended by a healthcare provider, as they play key roles in muscle contraction and relaxation. Drink enough water daily to keep muscles hydrated and functioning optimally.

Managing Expectations

Realistic Outcomes

CoolTone treatments can firm muscles, but not everyone sees the same results. Body types and lifestyle habits play a big role. Some people may see firmer muscles quickly, while others need more sessions.

Ariel’s experience showed quick results after just a few sessions. Raiza needed more time to see changes. Everyone’s body reacts differently to the treatment.

Sensations and Safety

During CoolTone treatments, you will feel muscle contractions. These are normal sensations. Some people describe it as cramping or tingling. It’s important to know that these sensations are part of the process.

Safety is a priority in CoolTone treatments. Most people don’t have problems, but some might feel mild discomfort. If you experience pain or skin eruptions, tell your provider.

Potential Risks

Like any procedure, there are risks involved with CoolTone. Allergies and itching may occur in rare cases. It’s crucial to share your medical history with your provider to avoid any complications.

Men and women both use CoolTone safely. However, if you have metal implants or certain health conditions, this treatment might not be for you.

Individual Differences

Results from CoolTone vary widely among individuals. Factors like diet, exercise habits, and genetics impact outcomes. People who maintain healthy lifestyles often see better results.

Ariel followed a strict fitness routine alongside her treatments and saw faster progress. Raiza had a busy schedule and couldn’t work out regularly, so her results took longer to appear.

Results and Permanency

Patient results

Patients often see visible results within a few weeks. Most need multiple sessions to achieve desired outcomes. Each session builds on the last, enhancing muscle tone.

Effects timeline

Initial effects can appear after two to four weeks. Full results typically show around three months post-treatment. This gradual improvement allows muscles to adapt and grow stronger.

Firmness and areas

CoolTone primarily targets abs, buttocks, and thighs. Treated areas become firmer and more defined. Some patients notice a visible enlargement of muscles in these regions.

Maintenance sessions

Results are not permanent without maintenance. Regular follow-up sessions help sustain muscle tone. Frequency depends on individual goals and response to treatment.

Lifestyle choices

Healthy habits extend results’ longevity. Proper diet and exercise support muscle health. Patients who maintain an active lifestyle see longer-lasting benefits.

Immediate improvements

e experience immediate improvements in muscle firmness post-treatment. Continued enhancements occur over several weeks as muscles strengthen further.

Post-Treatment Care

Hydration

Drink plenty of water after treatment. Hydration helps the body recover faster. It also aids in maintaining muscle tone. Aim for at least eight glasses a day.

Light Exercise

Engage in light exercise to keep muscles active. Walking or gentle stretching is beneficial. Avoid strenuous activities like weightlifting for a few days.

Avoiding Heat

Stay away from heat sources immediately post-treatment. Hot baths, saunas, and direct sunlight can cause discomfort. They may also lead to temporary redness or swelling.

Side Effects Management

Monitor any side effects closely. Typical side effects include mild tenderness and skin sensitivity at the injection site. Use cold compresses to reduce swelling if needed.

Allergic Reactions

Watch for signs of an allergic reaction. These can include severe redness or itching. Contact your provider if you experience these symptoms.

Follow-Up Sessions

Schedule follow-up sessions as recommended by your provider. These sessions help maintain results and address additional areas of concern. Regular check-ins ensure optimal outcomes.

Optimizing Treatment Outcomes

Lifestyle Changes

Combining CoolTone with other lifestyle changes can enhance results. Regular exercise helps maintain muscle tone. A balanced diet supports overall health.

Patients should aim for at least 30 minutes of exercise daily. This could include activities like walking, jogging, or cycling. Eating a diet rich in fruits, vegetables, and lean proteins also aids in weight loss and muscle strengthening.

Personalized Plans

A personalized treatment plan is crucial for optimal outcomes. Each patient’s goals and body type differ. Tailoring treatments ensures better results.

Doctors or specialists assess the target area before starting CoolTone. They consider factors such as existing medical conditions and desired augmentation levels. This assessment helps create a customized plan that suits individual needs.

Follow-Up Assessments

Regular follow-up assessments are important for long-term satisfaction. These check-ups allow providers to adjust the treatment plan as needed.

Patients should schedule follow-up visits every few months. During these visits, the physician evaluates progress and addresses any symptoms or adverse effects. Adjustments might include changing the frequency of sessions or incorporating additional exercises.

Avoiding Adverse Effects

Understanding potential risks helps minimize adverse effects. Though rare, some patients may experience side effects from CoolTone treatments.

Before starting, patients should discuss their medical history with their doctor. Those with cardiac pacemakers or other serious medical conditions need special consideration. The prescribing information provides guidelines to avoid complications.

Summary

CoolTone is a game-changer for those looking to tone and strengthen muscles without invasive procedures. By understanding its mechanism, preparing correctly, and managing your expectations, you can maximize the benefits of this innovative treatment. The results speak for themselves—firmer, more defined muscles with minimal downtime.

Ready to take the next step? Schedule your CoolTone consultation today and start your journey toward a more sculpted you. Don’t just dream about it; make it happen!

Frequently Asked Questions

What is CoolTone?

CoolTone is a non-invasive body contouring treatment that uses magnetic muscle stimulation to tone, firm, and strengthen muscles.

How does CoolTone work?

CoolTone works by sending electromagnetic pulses to muscle tissues, causing involuntary contractions. This process helps build muscle mass and improve muscle definition.

What should I expect during a CoolTone treatment?

During a CoolTone session, you will feel strong muscle contractions in the targeted area. The procedure typically lasts around 30 minutes and requires no downtime.

How should I prepare for my CoolTone session?

Wear comfortable clothing and avoid applying lotions or oils on the treatment area. Stay hydrated before your appointment.

Are there any side effects of CoolTone?

Common side effects include temporary muscle soreness, redness, or slight swelling in the treated area. These usually subside within a few days.

How long do CoolTone results last?

Results can be long-lasting with proper maintenance. Regular exercise and follow-up treatments are recommended to sustain muscle tone and strength.

What aftercare is needed post-treatment?

Post-treatment care includes staying hydrated, avoiding strenuous activities for 24 hours, and following any specific instructions provided by your practitioner for optimal results.

Arm Lift Revision: Addressing Common Post-Surgery Issues

Explaining Arm Lift Revision

Arm lift revision

Arm lift revision is a secondary surgery. It corrects issues from an initial arm lift. Patients might be unhappy with their first results. This surgery aims to improve them.

Necessity for patients

Many patients need this surgery. They may have had problems with postoperative scarring and adhesions after their first upper arm lift. These problems can range from minor to severe. Dissatisfaction often leads them to seek revision.

Consulting ASPS surgeons

Consulting with an ASPS member surgeon is crucial. These surgeons are certified by the American Society of Plastic Surgeons for surgical procedures, revisional surgery, primary abdominoplasty, and laser resurfacing. They have the necessary skills and experience.

Issues addressed

Several issues can be fixed through arm lift revision:

  • Insufficient skin removal: Sometimes, the initial surgery doesn’t remove enough skin at the incision site. This leaves excess skin hanging.
  • Improper scar placement: Scars might be visible or poorly placed at the incision site after the first surgery, leading to postoperative scarring and contour irregularities.
  • Asymmetry: One arm might look different from the other.
  • Residual fat: Some fat may remain in the upper arms, causing uneven contours, often requiring revision body contouring or plastic surgery for tissue excess and skin removal.

Insufficient skin removal

Insufficient skin removal is common. The surgeon may not have removed enough skin initially. This results in sagging and loose skin on the inner arm due to tissue excess and soft tissue, potentially requiring plastic surgery to correct contour irregularities.

Improper scar placement

Improper scar placement can be unsightly. Scars should ideally be hidden but sometimes aren’t. They might be too high or low on the arm, causing contour irregularities and tissue excess, posing a risk to the patient.

Asymmetry correction

Asymmetry is another issue addressed in revisions. One arm might appear larger or differently shaped than the other due to contour irregularities, tissue excess, or plastic surgery in the patient.

Residual fat removal

Residual fat can also cause dissatisfaction. The first surgery may leave some fat behind, creating contour irregularities and tissue excess in unwanted areas.

Initial vs Revision Procedures

Objectives and Techniques

Initial arm lift surgeries aim to remove excess skin and fat from the upper arms, involving plastic surgery and soft tissue treatment. This surgical procedure helps achieve a more toned appearance. The surgeon makes incisions along the inner arm or back of the arm during plastic surgery on the patient. Excess tissue is then removed, and the remaining skin is tightened during plastic surgery.

Revision procedures focus on correcting issues from the initial surgery, such as tissue excess and soft tissue concerns for the patient. These issues may include unsatisfactory results, scars, or asymmetry. Revision surgeries often involve more complex techniques. Surgeons may need to perform revisional surgery or excise additional tissue excess to improve the final results.

Complexity of Techniques

Revision surgeries can be more challenging than initial procedures. They may require advanced skills to address complications. Scar revision is a common revisional surgery technique used in these cases involving patient soft tissue excess. The surgeon carefully removes or adjusts scar tissue during revisional surgery to make it less noticeable for the patient.

Additional skin excision might also be necessary if there was not enough soft tissue removed during the initial surgery due to tissue excess in the patient. This process involves removing more skin for better contouring.

Importance of Preoperative Evaluation

A thorough preoperative evaluation by a qualified surgeon is crucial for successful revisional surgery in patients with soft tissue excess. This evaluation determines the appropriate approach for each patient. The surgeon assesses previous surgical outcomes and current conditions.

Preoperative evaluations help identify potential risks and plan the best strategy for revisional surgery and soft tissue procedures for the patient. Surgeons consider factors like skin elasticity, overall health, tissue excess, and desired outcomes during this patient evaluation of soft tissue.

Background Process

Understanding the background process of both initial and revision procedures is important for patient care and managing soft tissue excess. In primary body contouring surgeries, surgeons follow standard protocols to ensure patient safety and effectiveness in addressing soft tissue and tissue excess.

For revision procedures, surgeons must review patient medical histories and previous surgical records carefully, including soft tissue considerations. They use this information to develop a customized plan that addresses specific soft tissue concerns.

Common Post-Surgery Issues

Widened Scars

Many patients experience widened scars after an arm lift. These scars can be due to improper incision placement or tension on the wound. Widened scars are often more visible and can cause discomfort. They might require revision surgery to improve their appearance.

Improperly Placed Incisions

Improperly placed incisions can lead to aesthetic and functional problems. Incisions that are too high or low may not heal well. This can result in noticeable scarring or skin irregularities. Revising these incisions is crucial for better results.

Postoperative Scarring

Postoperative scarring is a common issue after an arm lift. Some scars may become hypertrophic or keloid, which are raised and thickened scars. These types of scars can be itchy and painful. Scar revision techniques aim to flatten and smooth out these areas.

Functional Problems

Scars from the initial surgery might inhibit arm movement. Adhesions, where scar tissue binds tissues together, can limit flexibility. This makes everyday activities difficult for some patients. Surgeons must carefully release these adhesions during a revision.

Additional Skin Removal

Removing additional skin during a revision is often straightforward. However, it requires precision to avoid complications. The surgeon must ensure that the remaining skin is tight and smooth.

Complications from Initial Surgery

Complications from the initial surgery can include infections, hematomas, and nerve damage. Infections need prompt treatment with antibiotics or drainage procedures. Hematomas may require surgical intervention to remove collected blood.

Side Effects of Revision Surgery

Revision surgeries have their own set of side effects. Patients might experience swelling, bruising, or temporary numbness in the arms. Proper postoperative care helps minimize these issues.

Emotional Impact

The emotional impact of complications should not be overlooked. Many patients feel frustrated when they need a revision surgery. Support from medical professionals and loved ones is crucial during this time.

Addressing Dissatisfaction

Patient Communication

Effective communication between patients and surgeons is crucial. It helps understand the reasons for dissatisfaction with the initial arm lift. Patients must express their concerns clearly. Surgeons should listen actively and provide detailed feedback. This dialogue ensures that both parties are on the same page.

Surgeons often ask about specific issues like scarring or asymmetry. They may also inquire about pain or discomfort experienced post-surgery. This information guides them in planning the revision surgery effectively.

Clarifying Expectations

During the consultation, expectations and achievable results are clarified. Surgeons explain what can realistically be achieved with a revision surgery. This step is essential to align patient expectations with possible outcomes.

Realistic goals help avoid future dissatisfaction. Patients learn about potential improvements and limitations of the revision procedure. Clear communication here reduces misunderstandings later.

Reviewing Before and After Pictures

Reviewing before and after pictures of similar cases sets realistic expectations for patients. These images offer a visual understanding of what the revision might achieve.

Surgeons typically show pictures of previous patients who had similar issues addressed through revisions. This helps new patients visualize possible outcomes more accurately.

Surgery Adjustments

Adjustments during revision surgery are based on initial feedback and consultations. Surgeons tailor their approach to address specific concerns raised by the patient.

Examples include adjusting skin tightness or refining scar appearance. Each adjustment aims to improve overall satisfaction with the surgical result.

Accessibility and Follow-up

Post-surgery accessibility is vital for monitoring recovery and addressing any lingering concerns. Patients should have easy contact options for follow-up questions or issues.

Many clinics offer multiple ways to reach out, including phone calls, emails, or even website portals for quick inquiries. Regular follow-ups ensure that recovery progresses smoothly, addressing any complications promptly.

Managing Scars and Contours

Scar Revision Techniques

Plastic surgeons use various techniques to improve scars. Scar revision can involve excision of the scar tissue. They may also use laser resurfacing to smoothen the skin. This helps reduce the visibility of hypertrophic scars.

Another method is repositioning the incision site. It places the scar in a less noticeable area. Compression garments are often used post-surgery to support wound healing.

Addressing Contour Irregularities

Contour irregularities can occur after an arm lift. These include uneven skin or excess fat deposits. Surgeons might perform liposuction to remove subcutaneous fat.

In some cases, they may need to remove redundant skin through wide excision. This ensures a smoother contour. The goal is achieving a natural look without visible imperfections.

Challenges with Widened Scars

Widened scars pose significant challenges. They often result from improper wound margins or tension on the incision site during healing.

Surgeons address this by carefully planning the new incisions. They ensure minimal tension on wound edges. Using advanced suturing techniques also helps in preventing widened scars.

Strategies for Incision Placement

Properly placed incisions are crucial for good outcomes. A poorly placed incision can lead to unsightly scars and contour issues.

Surgeons aim to place incisions where they will be least visible, such as along natural skin folds or creases. This strategic placement minimizes aesthetic concerns and improves overall satisfaction with the surgery results.

Simple vs Complex Revisions

Simple scar revisions involve minor adjustments. These might include laser treatments or small excisions of scar tissue.

Complex revisions often require more extensive procedures like wide skin excision combined with liposuction for optimal results. Both approaches aim at improving appearance but differ in their complexity and recovery time.

Resolving Asymmetry and Sagging

Addressing Asymmetry

Revision arm lift can correct asymmetry between arms. This often occurs after the initial surgery. Surgeons assess the difference in size and shape. They then plan the necessary adjustments.

Asymmetry can result from uneven healing or tissue excess. It may also be due to seroma formation or fat distribution differences. Correcting these issues involves precise surgical techniques.

Treating Sagging Skin

Continued sagging skin is another common issue. This usually happens after massive weight loss. Revision surgery removes additional loose skin.

The surgeon evaluates the extent of sagging. They check areas like the lateral chest wall and inframammary fold. The goal is to achieve a smoother, firmer appearance.

Assessment Process

The assessment process is crucial for revision surgery success. Surgeons conduct thorough examinations. They measure asymmetry and identify areas with excess skin or fat.

Patients’ medical history and previous surgeries are reviewed. Any complications from primary abdominoplasty are noted. This helps in planning a safe and effective procedure.

Tailored Surgical Approach

Each revision surgery is unique. Surgeons tailor their approach to each patient’s needs. They consider factors like tissue quality and healing capacity.

Techniques such as fat grafting may be used to improve contours. Soft tissue manipulation helps in achieving balanced results. The aim is always an aesthetically pleasing outcome.

Techniques Utilized

Various techniques address different issues:

  • Removing excess fat through liposuction.
  • Tightening loose skin with precise incisions.
  • Correcting dog ear deformities at incision sites.
  • Using fat grafts for better contouring.

These methods ensure comprehensive treatment of all concerns.

Balancing Outcomes

Achieving symmetry and reducing sagging requires skillful execution. Surgeons focus on creating natural-looking results. Balanced outcomes enhance patients’ confidence and satisfaction.

Timing for a Redo

Recommended Waiting Period

Patients should wait at least six months before considering an arm lift revision. This period allows the body to heal completely from the initial surgery. Swelling and bruising need time to subside for an accurate assessment of results.

Waiting also helps in identifying any asymmetry or sagging that may persist. A full recovery period ensures that any adjustments made during the revision are based on stable, final outcomes rather than temporary post-surgical changes.

Impact on Surgical Plan

Timing greatly affects the surgical plan and outcome. Surgeons need a clear view of the healed tissue to plan effectively. Rushing into a revision can lead to complications such as improper healing or additional scarring.

Patience is key for success. Proper timing allows surgeons to make precise corrections, leading to better aesthetic results. It also minimizes risks associated with secondary surgeries.

Patient Health Status

The patient’s health status plays a crucial role in determining timing. Those with underlying health conditions may require longer recovery times. Conditions like diabetes or poor circulation can slow down healing processes.

Surgeons will evaluate overall health before proceeding with a revision. Ensuring optimal health reduces risks and promotes faster recovery post-revision.

Nature of Issues Being Corrected

The specific issues needing correction also influence timing decisions. Minor asymmetries might be addressed sooner than more complex problems like significant sagging or scar tissue formation.

Surgeons assess each case individually. They consider factors such as skin elasticity, scar quality, and the extent of corrections needed. These evaluations help in setting an appropriate timeline for revision surgery.

Emotional Readiness

Emotional readiness is another important factor. Patients must feel mentally prepared for another surgery and its recovery process. The emotional toll of repeated procedures can be significant.

Taking time to fully recover emotionally from the first surgery ensures patients are ready for the challenges of a second operation. Mental well-being contributes significantly to overall satisfaction with surgical outcomes.

Reasons to Avoid a Second Surgery

Potential Risks

Revision surgery comes with significant risks. Surgeons often warn about complications such as infections, bleeding, and poor wound healing. Each surgery increases these risks.

Multiple surgeries can lead to scarring and tissue damage. These issues may affect the final outcome negatively.

Complications of Revisional Surgery

Revisional surgery can be more complex than the initial procedure. The surgeon must navigate scar tissue from the first surgery. This makes it harder to achieve desired results.

There is also a higher chance of nerve damage in revision surgeries. Nerve damage can cause numbness or chronic pain.

Minor Aesthetic Concerns

Not all aesthetic concerns warrant a second surgery. Minor asymmetries or small imperfections might not justify the risks involved.

Living with minor issues might be better than facing potential complications. It’s important to weigh how much these concerns impact daily life.

Realistic Expectations

Setting realistic expectations is crucial before considering another surgery. Revision surgery has limitations and cannot fix everything.

Patients should understand that perfect results are rarely achievable. Knowing this helps in making an informed decision.

Emotional Impact

Undergoing multiple surgeries can take an emotional toll. Recovery periods can be long and stressful, affecting mental health.

It’s essential to consider how additional surgeries will impact overall well-being. Sometimes, non-surgical solutions might be better for emotional health.

Identifying Revision Candidates

Unresolved Issues

Patients with unresolved issues from the initial surgery may need a revision. Common problems include asymmetry, excess skin, or scarring. These issues can impact the results and patient satisfaction.

A board-certified plastic surgeon should assess these concerns. They will determine if a revision is necessary.

Overall Health

Overall health plays a crucial role in determining revision candidates. Patients must be in good physical condition. Conditions like diabetes or heart disease increase the risk of complications.

Surgeons evaluate medical history and current health status. This ensures patients are fit for another surgery.

In-Person Evaluation

An in-person evaluation is essential. Only a qualified plastic surgeon can accurately assess the need for revision body procedures. During this consultation, they will examine the arm and discuss previous surgeries.

The surgeon will also explain potential risks and benefits of the revision. This helps patients make informed decisions.

Patient Motivation

Patient motivation is critical in deciding to undergo an arm lift revision. Patients must have realistic expectations about the outcomes. Unrealistic goals can lead to disappointment even after successful surgery.

Motivated patients tend to follow post-surgery guidelines better. This improves recovery and results.

Realistic Expectations

Realistic expectations are vital for any surgical procedure. Patients should understand that revisions might not achieve perfection but aim to improve existing conditions.

Surgeons often discuss possible outcomes during consultations. This prepares patients mentally for what to expect post-revision.

Final Remarks

Arm lift revision isn’t just about fixing past surgeries. It’s about getting you the results you deserve. From managing scars to resolving asymmetry, every step aims to give you confidence in your appearance.

Thinking about a redo? Make sure you’re a good candidate. Weigh the pros and cons carefully. If you’re ready to take the next step, consult with an experienced surgeon. Your journey to better results starts now.

Frequently Asked Questions

What is an arm lift revision?

An arm lift revision corrects issues from a previous arm lift surgery. It addresses concerns like scars, asymmetry, or sagging.

How does an initial arm lift differ from a revision procedure?

The initial arm lift removes excess skin and fat. A revision focuses on refining results, correcting issues, and improving overall appearance.

What are common post-surgery issues after an arm lift?

Common issues include scarring, asymmetry, and residual sagging. These can impact satisfaction with the surgery’s outcome.

How can dissatisfaction with an arm lift be addressed?

Dissatisfaction can often be addressed through a revision procedure. Consult your surgeon to discuss specific concerns and possible solutions.

When is the right time for an arm lift redo?

Timing varies but typically wait at least 6-12 months after the initial surgery. This allows sufficient healing before considering another procedure.

Why might someone avoid a second arm lift surgery?

Risks include complications, additional scarring, and prolonged recovery time. Weigh these risks against potential benefits before deciding on a revision.

Who is a good candidate for an arm lift revision?

Ideal candidates are those in good health who have realistic expectations and specific concerns about their initial surgery results.

Scar Revision Cost: Affordable Tummy Tuck Scar Solutions

Understanding Tummy Tuck Scars

Scar Formation

Tummy tuck scars form after the surgery. The cosmetic procedure involves a facial plastic surgeon making incisions to remove excess skin and fat, with scar revision techniques to minimize any noticeable scar. These incisions result in surgical scars. Most often, these scars from trauma or cosmetic procedures are located just above the pubic area, according to a plastic surgeon. They can extend from one hip to the other.

Common Locations

There are specific areas where tummy tuck scars appear. The most noticeable scar is usually horizontal and runs along the lower abdomen in most cases, depending on skin type and affected areas. Another possible scar location is around the belly button. This happens if the navel needs repositioning during surgery.

Factors Influencing Appearance

Several factors impact how a scar looks after healing. Genetics play a significant role in this process. Some people naturally heal with less visible scars due to their genetic makeup and body areas in some cases, which help.

The surgical technique used also affects scar appearance. Surgeons may use different methods to close incisions, influencing how well a scar heals in cases within the facility area. Proper wound care post-surgery is crucial as well.

Setting Realistic Expectations

Setting realistic expectations for scar healing is important. Scars may not disappear completely but will fade over time in most cases. It’s essential to understand that noticeable scars are common after a tummy tuck and may vary in cases depending on the facility.

Scar visibility can vary based on individual healing processes. Patients should discuss potential outcomes, including noticeable scar cases and scar revision techniques, with their surgeon before the procedure.

Scar Prevention Tips

Proper Wound Care

Proper wound care is crucial for minimizing scar formation. Clean wounds with mild soap and water. Avoid using harsh chemicals. Cover the wound with a sterile bandage to keep it clean. Change the bandage daily or when it becomes dirty.

Post-Operative Practices

Follow your surgeon’s instructions carefully after surgery. Keep the surgical site clean and dry. Avoid strenuous activities that might stretch the scar. Use prescribed ointments to promote healing and reduce inflammation.

Healthy Lifestyle

A healthy lifestyle may play a significant role in a range of scar prevention cases. Eat a balanced diet rich in vitamins and minerals. Vitamins A, C, and E may be essential for skin health. Drink plenty of water to keep your skin hydrated.

Avoid smoking as it may impair blood flow to the skin. Smoking can delay healing and worsen scarring.

Silicone Sheets and Gels

Silicone sheets and gels may range in effectiveness for reducing scar visibility at the facility. Apply silicone sheets over the healed wound daily for a range of several hours, if facility allows, and you may see improvement. Use silicone gels as directed by your doctor.

Studies show that silicone products may flatten scars and improve their color over a range of time in the facility.

Avoid Sun Exposure

Sun exposure can darken scars, making them more noticeable. Protect your scars from the sun by wearing protective clothing or using sunscreen with at least SPF 30, which may range in effectiveness depending on the facility.

Treatment Overview

Non-surgical Options

Non-surgical treatments are popular for scar revision. These methods may be less invasive and often have shorter recovery times, potentially reducing facility fees. Laser therapy is one common option. It works by removing the top layer of skin, which may reduce the range of appearance of scars.

Another non-surgical method is microneedling. This may involve tiny needles that create small wounds that range in the skin. The body may then heal these wounds, improving the scar’s texture and range.

Surgical Options

Surgical treatments may be more invasive but can range to provide dramatic results. One option is scar excision. This may involve cutting out the scar and rejoining the skin with fine stitches, which may range in complexity.

A more complex procedure is tissue expansion. This technique may stretch the skin around the scar area to make it easier to remove or reduce the scar.

Combination Treatments

Combining treatments can yield optimal results in many cases. For example, a patient may undergo a range of treatments, including laser therapy followed by microneedling, to enhance the overall outcome.

The patients may benefit from combining a range of surgical and non-surgical methods. This approach may address a range of aspects of scarring, from texture to color differences.

Consulting a Plastic Surgeon

Consulting a plastic surgeon is crucial for choosing the most suitable treatment plan, which may range. Each case is unique, and what works for one patient may not work for another, given the range of variables involved.

Plastic surgeons may provide detailed information about each treatment option range. They may also consider factors like the location and size of the scar, as well as its depth and age, which may range.

Non-surgical Methods

Dermal Fillers

Dermal fillers can help improve the appearance of scars. They plump the skin and make scars less noticeable. The use of dermal fillers may range in cosmetic procedures. They are injected into the skin beneath the scar. This may raise the scar to the level of surrounding skin in a range of cases.

Fillers like hyaluronic acid or collagen are used. These substances are naturally found in the body. Results from dermal fillers can last for several months. Repeat treatments may be needed for long-term results.

Laser Skin Resurfacing

Laser skin resurfacing improves scar texture and appearance. It uses focused light beams to remove layers of skin. This process stimulates new skin growth.

There are two main types of laser resurfacing: ablative and non-ablative, which range in intensity and recovery time. Ablative lasers remove thin layers of skin, while non-ablative lasers stimulate collagen growth without removing skin layers.

The procedure can be done in a dermatologist’s office. Recovery time varies based on the range and type of laser used. Patients might experience redness and swelling after treatment.

Dermabrasion

Dermabrasion is another method to treat scars. It involves sanding down the outer layer of skin using a range of rotating instruments.

This technique smooths out a range of uneven surfaces and promotes new skin growth. Dermabrasion is effective for raised scars and acne scars.

A local anesthetic is usually applied before the procedure to minimize the range of discomfort. Some redness and swelling may occur post-treatment, but these symptoms typically subside within a range of a week.

Chemical Peels

Chemical peels use acids to remove damaged outer layers of skin. This helps reduce scarring by promoting a range of new, smoother skin growth.

There are a range of different strengths of chemical peels: light, medium, and deep. Light peels use milder acids like alpha-hydroxy acid (AHA), while deep peels use stronger acids like phenol.

The choice of peel depends on scar severity and skin type range. Multiple sessions might be necessary for optimal results.

Minimally Invasive Options

Micro-needling

Micro-needling is a popular minimally invasive option. It involves using a range of tiny needles to create small punctures in the skin. These punctures stimulate collagen production. Collagen helps improve the texture and appearance of scars. Micro-needling can be done under a range of local anesthesia to minimize discomfort.

Fat Grafting

Fat grafting is another effective treatment. This procedure involves transferring a range of fat from one part of the body to the scar area. The added volume can improve the appearance of a range of deep or sunken scars. Fat grafting usually requires a range of more than one session for optimal results.

CO2 Laser

CO2 laser treatment is also minimally invasive. It uses carbon dioxide lasers to remove layers of skin around the scar tissue. This process promotes new, healthy skin growth. CO2 laser treatments range are often performed under local anesthesia and have a short recovery time.

Steroid Injections

Steroid injections are used to reduce a range of scar tissue buildup and inflammation. They are particularly effective for keloid and hypertrophic scars. Steroid injections can flatten a range of raised scars and make them less noticeable over time.

Time Factor

The effectiveness of these treatments varies with time. Some options, like micro-needling, show a range of results after several sessions spread over months. Others, like steroid injections, may require a range of repeated treatments every few weeks or months.

Surgical Revision Techniques

Scar Removal

Plastic surgeons use a range of surgical scar revision techniques to improve the appearance of scars. They remove scar tissue and re-close the incision. This process helps make the scar less visible. General anesthesia is often required for this procedure.

Patients usually have better aesthetic results after surgical revision. The surgeon carefully cuts out the old scar. Then, they stitch the skin back together in a way that minimizes new scarring.

Z-Plasty Technique

Z-plasty is one common technique used by plastic surgeons. It involves making a Z-shaped incision around the scar. This allows for better alignment with natural skin folds.

The surgeon repositions the skin flaps created by the Z-incision. This makes the scar less noticeable and improves its appearance over time.

Z-plasty can also help reduce tension on the skin around the scar. This reduces the risk of new scars forming in the future.

W-Plasty Technique

W-plasty is another technique used to revise scars. It involves making a W-shaped incision along the length of the scar. The surgeon removes small triangles of skin from both sides of the scar.

This technique breaks up a long, straight scar into smaller segments. As a result, the revised scar blends more naturally with surrounding skin.

W-plasty works well for facial scars and other highly visible areas. It can significantly improve cosmetic outcomes for patients.

General Anesthesia

Surgical revision techniques often require general anesthesia. Patients are asleep during the procedure, which ensures they feel no pain.

General anesthesia also allows surgeons to work more precisely, leading to better results. However, it comes with risks and requires careful monitoring by medical professionals.

Cost Breakdown

Non-Surgical Methods

Non-surgical scar revision methods are often the least expensive. These include treatments like laser therapy, dermabrasion, and chemical peels. The average cost for these procedures can range from $200 to $1,500 per session. Many patients need multiple sessions for optimal results.

Minimally Invasive Options

Minimally invasive options fall between non-surgical and surgical methods in terms of cost. Treatments like microneedling and injectable fillers are common. The average price for microneedling ranges from $300 to $700 per session. Injectable fillers can cost between $600 and $1,200 per syringe. Like non-surgical methods, these may require multiple sessions.

Surgical Procedures

Surgical scar revision is usually the most expensive option. Procedures such as excision or skin grafting fall into this category. The average cost for surgical scar revision ranges from $1,500 to $4,000 or more, depending on the complexity of the surgery.

Factors Affecting Costs

Several factors can affect the total cost of scar revision treatments:

  • Type of treatment: Non-surgical methods are cheaper than surgical ones.
  • Surgeon’s experience: More experienced surgeons often charge higher fees.
  • Geographic location: Costs can vary significantly by region.

Additional Expenses

Beyond the primary procedure costs, there are additional expenses to consider:

  • Anesthesia fees: These can add several hundred dollars to your bill.
  • Facility fees: Using a hospital or specialized clinic can increase costs.
  • Recovery supplies: Items like bandages and ointments also contribute to overall expenses.

Financing Options

CareCredit Card

A popular financing option for scar revision is the CareCredit credit card. It helps cover medical expenses not included in insurance. Patients can use it to pay for treatments and procedures, including scar revision.

Applying for a CareCredit card is straightforward. You need to fill out an application form online or at a participating provider’s office. Approval depends on your credit score and financial history.

Medical Financing Application

Medical financing applications are essential for those who cannot afford upfront payments. Many healthcare providers offer these plans. They spread the cost over several months or years.

Choosing a provider who accepts medical financing is crucial. It ensures you can manage the payments easily. Always check if your chosen facility offers this option before proceeding with the treatment.

Health Insurance Coverage

Health insurance may cover part of the scar revision cost if deemed medically necessary. This includes cases where scars affect your ability to perform daily tasks or cause significant emotional distress.

To determine coverage, contact your health insurance company. Provide them with all necessary documentation from your healthcare provider. This might include photos, medical records, and a letter explaining why the procedure is necessary.

Facility Fees and Other Costs

Facility fees contribute significantly to the overall cost of scar revision. These include charges for using the operating room, anesthesia, and post-operative care.

Knowing these costs upfront can help you plan better financially. Some facilities offer discounts or payment plans to make treatments more affordable.

Factors Influencing Cost

Several factors influence the total cost of scar revision:

  • Number of Layers: Deeper scars requiring multiple layers of sutures increase costs.
  • Size in cm: Larger scars generally require more work and resources.
  • Location: The facility’s location affects pricing due to varying operational costs in different areas.
  • Candidate Suitability: Not all patients are ideal candidates for certain techniques, which might necessitate alternative methods that could be pricier.

Understanding these factors can help you anticipate potential expenses and explore appropriate financing options.

Benefits of Financing

Financing options provide several benefits:

  • Accessibility: Make treatments accessible without needing full payment upfront.
  • Manageability: Spread out payments make it easier to budget.
  • Flexibility: Choose from various plans based on your financial situation.

Summary

Understanding and managing tummy tuck scars is crucial for achieving the best results. From prevention tips to revision techniques, you now have a comprehensive guide. Costs can vary, but knowing your options helps in making informed decisions.

Ready to take the next step? Consult with a qualified professional to explore the best scar treatment for you. Your journey to smoother skin starts now. Don’t wait—get expert advice and regain your confidence today!

Frequently Asked Questions

What factors affect the cost of scar revision?

The cost varies based on the size and location of the scar, the type of treatment, and the surgeon’s experience. Geographic location also plays a role.

Are non-surgical methods effective for scar revision?

Non-surgical methods like laser therapy and chemical peels can be effective for minor scars. They are less invasive and have shorter recovery times.

How much does surgical scar revision typically cost?

Surgical scar revision can range from $500 to $3,000. The exact price depends on the complexity and length of the procedure.

Can insurance cover scar revision costs?

Insurance may cover scar revision if it’s deemed medically necessary. Check with your provider for specific coverage details.

What financing options are available for scar revision?

Many clinics offer payment plans or financing options through third-party lenders. This helps spread out the cost over time.

How long is the recovery period after surgical scar revision?

Recovery typically takes 1-2 weeks. However, complete healing can take several months depending on individual cases.

Are there any risks associated with minimally invasive options?

Minimally invasive options carry fewer risks compared to surgery but may include temporary swelling, redness, or discomfort. Always consult your doctor for personalized advice.

Aqualipo Safety | Comparing Water-Assisted Liposuction to Traditional Methods

Understanding Liposuction

Definition

Liposuction is a plastic surgery procedure. It removes unwanted fat from specific areas of the body. Common target areas include the abdomen, thighs, and arms. The goal is to improve body contouring by eliminating stubborn fat deposits.

Evolution

Traditional liposuction procedures began in the 1970s. Early methods were invasive and required long recovery times. Over the years, techniques have evolved significantly. Modern methods are less invasive and offer quicker recovery periods.

Traditional Techniques

Traditional liposuction techniques involve making small incisions in the skin. A cannula is inserted to break up fat cells. Suction then removes these cells from the body. This method can be effective but may cause more bruising and swelling.

Modern Methods

Newer liposuction techniques aim to reduce trauma to the body. These include laser-assisted lipo and ultrasound-assisted lipo. These methods use energy waves to liquefy fat before removal, resulting in less damage to surrounding tissues.

Patient Eligibility

Not everyone is a good candidate for liposuction. Ideal candidates are generally healthy individuals with localized fat deposits that do not respond to diet or exercise. It’s important for patients to have realistic expectations about what liposuction can achieve.

Realistic Expectations

Liposuction is not a weight loss solution. It is best suited for people close to their ideal weight who want to remove specific areas of fat. Results can vary based on factors like age, skin elasticity, and overall health.

Aqualipo vs Traditional Methods

Safety Profile

Aqualipo has a better safety profile than traditional liposuction. The gentle water used in Aqualipo reduces trauma to the body. Traditional methods involve more invasive techniques, increasing risks. Traditional liposuction can lead to more bruising and swelling.

Patients often experience less pain with Aqualipo. This method minimizes damage to surrounding tissues. There is also a lower chance of complications like infections or blood clots.

Procedure Techniques

The techniques in Aqualipo differ from older methods significantly. In traditional liposuction, doctors use a cannula to break up fat manually. This method can be rough and cause more tissue damage.

Aqualipo uses a water jet to dislodge fat cells gently. This approach is less invasive and more precise. It allows for better control during the procedure.

The need for general anesthesia is reduced with Aqualipo. Many patients only require local anesthesia, which lowers risks further.

Patient Outcomes

Patients generally report higher satisfaction with Aqualipo compared to traditional methods. Recovery times are shorter due to less trauma during the procedure. Many return to normal activities within days instead of weeks.

The results tend to be smoother and more natural-looking with Aqualipo. The gentle water technique helps achieve even fat removal, reducing lumps and irregularities.

Examining Invasiveness

Minimally Invasive

Aqualipo is known for its minimally invasive nature. It uses water jet technology to break down fat cells. This method requires only small incisions. The tiny cuts lead to less scarring and faster recovery.

Local anesthesia is used during Aqualipo procedures. This reduces risks associated with general anesthesia. Patients stay awake but feel no pain.

Role of Local Anesthesia

Local anesthesia plays a key role in Aqualipo’s safety. It numbs the targeted area, making the procedure comfortable. Using local anesthesia avoids complications linked to general anesthesia.

Patients can usually return home the same day. Recovery time is shorter compared to other methods. The risk of infection and bleeding is minimized.

Comparing Other Methods

Traditional liposuction involves larger incisions and more aggressive techniques. This can lead to more bruising and longer recovery times. General anesthesia is often required, increasing procedural risks.

Laser-assisted liposuction uses heat to melt fat cells before removal. This method can cause burns or skin damage if not done correctly. Aqualipo’s water jet approach is gentler on tissues.

Ultrasound-assisted liposuction uses sound waves to liquefy fat cells. While effective, it may also damage surrounding tissues. Aqualipo’s precision reduces collateral damage.

Recovery Insights

Typical Timeline

Aqualipo patients often experience a shorter recovery period. Most people can return to normal activities within a few days. Healing time is usually around one to two weeks. Swelling and bruising may occur but are minimal compared to traditional liposuction.

Reduced Recovery Time

The recovery time for Aqualipo is significantly less than traditional liposuction. Traditional liposuction requires several weeks of healing. In contrast, Aqualipo patients see an improved body contour with less downtime. This makes it a popular choice for those seeking quicker results.

Activity Restrictions

During the initial recovery phase, avoid strenuous activities. Light walking is encouraged to promote blood flow. Patients should refrain from heavy lifting and intense exercise for at least two weeks. Following these guidelines helps reduce trauma and speeds up the healing process.

Care Instructions

Proper care after Aqualipo is crucial for a smooth recovery. Keep the treated area clean and dry. Wear compression garments as directed by your doctor. These garments help in reducing swelling and support the new contours of your body.

Tips for Smooth Recovery

  1. Follow all post-procedure instructions given by your healthcare provider.
  2. Stay hydrated and maintain a healthy diet.
  3. Avoid smoking and alcohol as they can impede healing.
  4. Take prescribed medications on time to manage pain and prevent infection.

Side Effect Overview

Common Side Effects

Aqualipo is generally safe, but some side effects can occur. Most are mild and temporary. Patients may experience discomfort or mild pain after the procedure. Swelling is also common and usually subsides within a few days. Bruising can appear at the treatment site but fades over time.

Minimizing Risks

Aqualipo uses advanced technology to reduce severe side effects. The procedure involves injecting a water-based solution into the fat cells. This technique minimizes trauma to surrounding tissues. It reduces the chances of significant pain and swelling compared to traditional liposuction methods.

Managing Minor Discomfort

Managing minor side effects at home is straightforward. Applying ice packs can help reduce swelling and bruising. Over-the-counter pain relievers like ibuprofen can alleviate discomfort. Wearing compression garments as recommended by your doctor can also speed up recovery.

Anesthesia Use

Local anesthesia is typically used for Aqualipo, making it safer than procedures requiring general anesthesia. Local anesthesia numbs only the treatment area, reducing overall risk and recovery time.

Post-Procedure Care

Following post-procedure care instructions is crucial for minimizing side effects. Keep the treated area clean and dry to prevent infection. Avoid strenuous activities for at least a week to allow proper healing.

Cost Considerations

Factors Influencing Cost

Several factors affect the cost of Aqualipo. The location of the clinic plays a significant role. Clinics in major cities often charge more due to higher operating costs. The size of the treatment area impacts the price. Larger areas require more time and resources, increasing the overall cost.

Comparison with Traditional Liposuction

Aqualipo is generally more cost-effective than traditional liposuction. Traditional liposuction involves longer procedures and recovery times, which can add to the expense. In contrast, Aqualipo offers minimal downtime and quicker results, making it a preferred option for many patients.

Non-Invasive Alternatives

Non-invasive alternatives like CoolSculpting also exist. These methods are usually less expensive upfront but may require multiple sessions to achieve desired results. Aqualipo provides noticeable changes after just one session, offering better value for those seeking immediate improvements.

Financing Options

Many clinics offer financing options to make Aqualipo more accessible. Payment plans allow patients to spread out the cost over several months. Some providers partner with medical financing companies that offer low-interest loans specifically for cosmetic procedures.

Insurance Considerations

Insurance rarely covers cosmetic procedures like Aqualipo. This is because they are considered elective surgeries rather than medically necessary treatments. Patients should consult their insurance provider to understand their coverage options better.

Choosing the Right Clinic

Experienced Specialists

Selecting a clinic with experienced Aqualipo specialists is crucial. These professionals should have extensive training in the procedure. Look for clinics that employ board-certified surgeons who specialize in Aqualipo. This ensures they are familiar with the latest techniques and safety protocols.

Clinic Accreditation

Clinic accreditation is another important factor. Accredited clinics meet strict standards for patient care and safety. Check if the clinic has been accredited by recognized medical boards or organizations. This can provide peace of mind about the quality of care you will receive.

Patient Reviews

Patient reviews offer valuable insights into a clinic’s reputation. Read reviews on independent websites to get an unbiased perspective. Look for patterns in feedback, such as consistent praise for professionalism or frequent complaints about specific issues.

Before-and-After Galleries

Before-and-after galleries showcase the results achieved by the clinic’s specialists. These images can help you gauge their expertise and success rates. Pay attention to patients with similar body types and treatment areas to see potential outcomes for yourself.

Consultation Questions

During your consultation, ask specific questions about the practitioner’s experience:

  1. How many Aqualipo procedures have they performed?
  2. What is their success rate?
  3. Can they provide testimonials from previous patients?

These questions help assess their competence and confidence in performing Aqualipo.

Success Rates

Success rates are an important metric when evaluating a clinic. Higher success rates often indicate better outcomes and fewer complications. Ask about their success rates and how they handle any complications that may arise during or after the procedure.

Alternative Options

Discuss alternative options during your consultation as well. Some patients may not be ideal candidates for Aqualipo due to various factors like health conditions or treatment area specifics. Understanding all available treatments helps make an informed decision.

Gentle Approach

Aqualipo is known for its gentle approach compared to traditional liposuction. Ensure the specialist emphasizes minimal discomfort and uses techniques that involve small incisions for quicker recovery times.

Aqualipo Versatility

Treatable Areas

Aqualipo can treat a wide range of body areas. These include the abdomen, thighs, and arms. It also works on smaller areas like the chin and neck. This makes it a versatile option for many patients.

The procedure is gentle enough for delicate regions. Yet, it is effective for larger zones too. The versatility allows doctors to tailor treatments to specific needs.

Large Volume Removal

Aqualipo is effective for large volume fat removal. It uses a water-jet system to break down fat cells. This method is less invasive than traditional liposuction.

Patients often see significant results after one session. The recovery time is shorter compared to other methods. This makes it an attractive option for those wanting quick results with less downtime.

Precise Contouring

Besides large volume removal, Aqualipo offers precise contouring. Doctors can target small pockets of fat accurately. This precision helps in sculpting the body.

The water-jet technique allows for smooth transitions between treated and untreated areas. Patients achieve more natural-looking results. This precision makes Aqualipo ideal for fine-tuning body shapes.

Suitable for Various Body Types

Aqualipo suits various body types and goals. Whether someone wants minor adjustments or major changes, this method works well.

People with different skin types can also benefit from Aqualipo. The procedure’s gentleness reduces risks like scarring or uneven skin texture.

Benefits of Aqualipo

Safety

Aqualipo uses a gentle water-based process. This reduces trauma to the body. Traditional liposuction can be harsh and painful. Aqualipo is less invasive and safer. The risk of complications is lower. Patients experience fewer side effects.

Minimal Downtime

Recovery time is short with Aqualipo. Most people return to normal activities within a few days. Traditional methods require longer recovery periods. With Aqualipo, patients face less disruption in their lives.

Natural-Looking Results

Aqualipo provides smooth and natural results. The water-based method allows for precise fat removal. This leads to better contouring and shape. Patients often report high satisfaction with their appearance post-procedure.

Psychological Benefits

Improved body contouring boosts self-esteem. Many people feel more confident after the procedure. Wearing clothes becomes more enjoyable. Social interactions improve, leading to a happier life.

Physical Benefits

Aqualipo enhances physical health too. Removing excess fat can reduce strain on joints. It can also lower the risk of certain diseases like diabetes and heart conditions.

Patient Satisfaction Rates

Studies show high patient satisfaction rates for Aqualipo. Many report positive experiences and outcomes. The minimal pain and quick recovery contribute to this satisfaction.

Long-Term Effectiveness

The results of Aqualipo are long-lasting if maintained with a healthy lifestyle. Patients enjoy their new contours for years to come. Regular exercise and proper diet help sustain these results.

Closing Thoughts

Aqualipo offers a modern, less invasive alternative to traditional liposuction. With quicker recovery times and fewer side effects, it’s an appealing option for those seeking body contouring. You get the benefits without much downtime or discomfort, making it easier to fit into your busy life.

Ready to explore Aqualipo? Do your homework. Choose a reputable clinic and consult with professionals who have experience and expertise in this field. Your body deserves the best care. Take the next step towards achieving your desired look today!

Frequently Asked Questions

Is Aqualipo safer than traditional liposuction?

Yes, Aqualipo is generally considered safer. It uses a gentler water jet to dislodge fat, reducing trauma and risks associated with traditional liposuction.

How invasive is Aqualipo compared to other methods?

Aqualipo is less invasive. It causes minimal tissue damage and results in less bruising and swelling compared to traditional liposuction.

What is the recovery time for Aqualipo?

Recovery from Aqualipo is typically faster. Most patients return to normal activities within a few days, unlike traditional methods which may require weeks.

Are there any side effects of Aqualipo?

Side effects are minimal. Patients might experience slight swelling or bruising, but these usually subside quickly.

How much does Aqualipo cost?

Costs vary by clinic and location but expect to pay between $2,000 and $6,000 per session. It’s important to consult with your chosen clinic for precise pricing.

Can anyone get Aqualipo?

Most people are good candidates for Aqualipo. However, it’s essential to have a consultation with a qualified doctor to determine suitability based on individual health conditions.

What are the benefits of choosing Aqualipo?

Aqualipo offers numerous benefits: less pain, quicker recovery, reduced risk of complications, and more precise fat removal. This makes it an attractive option for many seeking body contouring solutions.